Three-flue Chimney Rebuild

Project updates and progress reports
BlakeHillHouse
Been here a while
Posts: 162
Joined: Mon Aug 17, 2015 1:38 pm

Three-flue Chimney Rebuild

Post by BlakeHillHouse »

Let me preface this by saying that this was not a DIY project. We saved for a couple of years and paid a mason. Also, I was unable to get on the roof to take before shots and after shots, but I did my best. :thumbup:

Before:

The upper roof is 22' off the ground. The old concrete cap was disintegrating, and the brick was beyond the repointing stage. We also did not have any flue caps.
Image

Scaffolding:
Image

In progress (They let me climb on to the roof.):

A view of the three flues (top to bottom: main bedroom, living room, basement)
Image

Close-up of the bricks
Image

Finished Chimney:

The new flashing
Image

Concrete cap + flue covers
Image

Image

We are one step closer to cozy fires during the winter!
Stacy
Owner and Blogger of our 1880s...um...Colonial? Victorian?
Image

phil
Has many leather bound books
Posts: 4616
Joined: Tue Aug 18, 2015 6:11 pm
Location: Near Vancouver BC

Re: Three-flue Chimney Rebuild

Post by phil »

can you tell us about the clay flu liners? did they stack them all the way down inside the chimney or is this just near the top? mine is only 2 flu's but I keep wondering if they should be added, or what would support their weight. can I assume old houses usually didn't have them but they are added to help preserve the chimney?

I think someone worked on mine and at least it does have a cap, no liners either. I'm pretty sure they re-pointed or laid some brick near the top with cement but I dont see changing that at this point. at the back of my firebox there is some fire brick about 1/2" thick , its a litle cracked up from expansion and contraction. I sort of worried about it at first but it didnt' seem to harm much and I've used it lots. I keep wanting to get the right mortar so I can replace just whats cracked up and missing. since that stuff is right in the fire it gets hot of course. I had a mason look and he shrugged said they often crack like that you can fix it , it will crack there again. he didn't think it was a safety issue.

Ive got a brush thing to clean it and I'm hoping to pull it up and down a bit to make sure its clear. I can see better if I stick a light and my head right into the fireplace and look up, but I should probably clean the ashes out first ;-)

phil
Has many leather bound books
Posts: 4616
Joined: Tue Aug 18, 2015 6:11 pm
Location: Near Vancouver BC

Re: Three-flue Chimney Rebuild

Post by phil »

I'm interested in how the step flashing is done because Im re-roofing and so I need to mess with it. It looks like on yours they put it into the brick and used mortar to attach it, but then when the roofers did your roof instead of making the shingles interweave the stepflasing they put a membrane on top of the step flashing. I think maybe the flashing is older than your roof so they just left it n place.
usually the step flashing is supposed to be laid down so it is between each shingle and so the bottom edge is on top of the shingle. My step flashing is a lot older and more used but I decided just to try to reuse it and keep it stuck in the mortar but mine isn't as neat as yours. I plan to add a counterflashing and that will be like a bit of metal trim that hides the step flashing. I'm not saying yours is wrong or anything I'm just trying to sort out how I should do mine..
I'm planning to add a cricket which is like a couple of triangles of plywood that goes up behind the chimney. it then slopes so the water diverts rather than having that space behind and above the chimney for snow to collect. As it were, I finished my new roofing along one side and opted to do the rest of the roof ( above and the other side) next year so I have time to figure this stuff out a bit.

on one video they showed to cut the mortar out with a angle grinder to remove the step flashing then they rolled up lead and inserted the rolled up lead into the gap along with the flashing then they hammered it in place, rather than using mortar for this. I decided I better not start into cutting all the old step flashing out as it looked like a can of worms and it was time to stop before the rains came. it looks like your mason didn't mess with yours and I assume he probably had a look and considered it ok just the way it is.

User avatar
GinaC
Forgotten more than most know
Posts: 437
Joined: Sat Jan 26, 2019 8:19 pm
Location: Newport, VT

Re: Three-flue Chimney Rebuild

Post by GinaC »

My chimney has been sitting half-built for 2 weeks now, and I have no idea when the guy is going to come back to finish it. Then the liners and the new wood stove insert have to go in. To be fair, the weather hasn't been all that cooperative.

Oh, and I'm getting stainless steel liners put in, since my original ceramic ones are shot. Fire is something I'm terrified of, so I'm putting a lot of money into this job.
1939 Minimal Traditional

BlakeHillHouse
Been here a while
Posts: 162
Joined: Mon Aug 17, 2015 1:38 pm

Re: Three-flue Chimney Rebuild

Post by BlakeHillHouse »

GinaC wrote:
Oh, and I'm getting stainless steel liners put in, since my original ceramic ones are shot. Fire is something I'm terrified of, so I'm putting a lot of money into this job.


Chimney rebuilds are such huge projects. I hope your mason comes back soon. We were lucky to have excellent weather for the entire two weeks, but that was out of the ordinary here.

We will likely be putting in liners too. I'm still trying to decide if I want a gas insert, gas log, or wood-burning insert.
Stacy
Owner and Blogger of our 1880s...um...Colonial? Victorian?
Image

BlakeHillHouse
Been here a while
Posts: 162
Joined: Mon Aug 17, 2015 1:38 pm

Re: Three-flue Chimney Rebuild

Post by BlakeHillHouse »

phil wrote:can you tell us about the clay flu liners? did they stack them all the way down inside the chimney or is this just near the top? mine is only 2 flu's but I keep wondering if they should be added, or what would support their weight. can I assume old houses usually didn't have them but they are added to help preserve the chimney?


There were approximately 12" long clay flue liners up there before the rebuild. They were 8"X8" (outer edges). The bricks were all original, but it's possible the cap and liners were added later.

They replaced the liners with 11 3/4" X 11 3/4" liners that were approximately 18 " long. About half of the height is buried in the mortar. We chose larger ones because modern metal chimney liners wouldn't fit easily in liners of the old size. The change in size offered flexibility for our plans, TBD.

I hope that helps!
Stacy
Owner and Blogger of our 1880s...um...Colonial? Victorian?
Image

BlakeHillHouse
Been here a while
Posts: 162
Joined: Mon Aug 17, 2015 1:38 pm

Re: Three-flue Chimney Rebuild

Post by BlakeHillHouse »

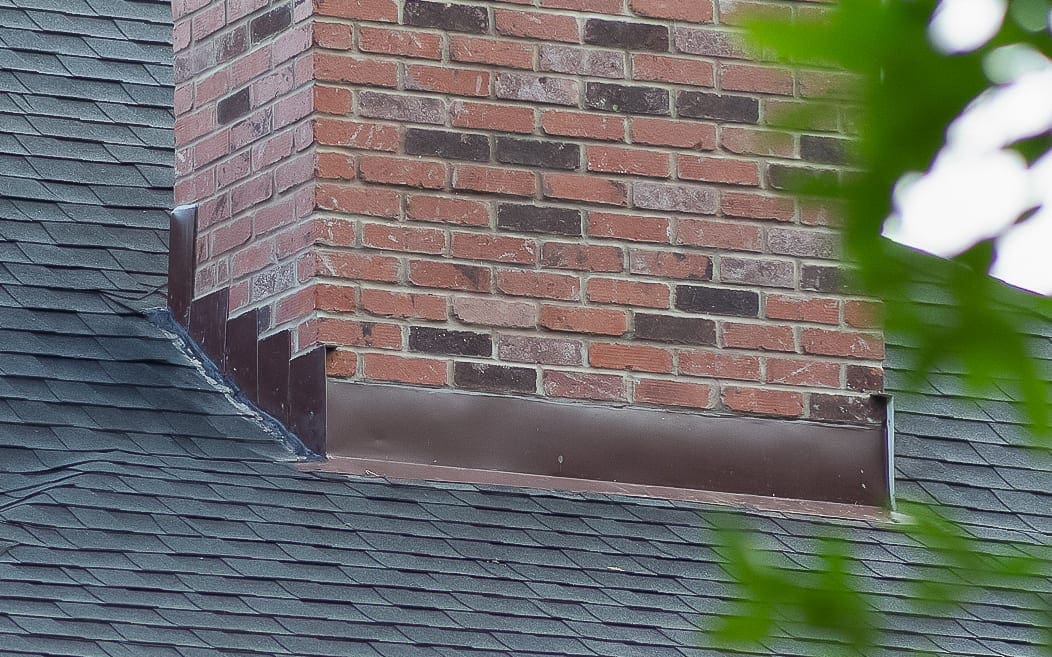
phil wrote:I'm interested in how the step flashing is done because Im re-roofing and so I need to mess with it. It looks like on yours they put it into the brick and used mortar to attach it, but then when the roofers did your roof instead of making the shingles interweave the stepflasing they put a membrane on top of the step flashing. I think maybe the flashing is older than your roof so they just left it n place.


I'm not a roofer, but I play one on the internet. :thumbup: 
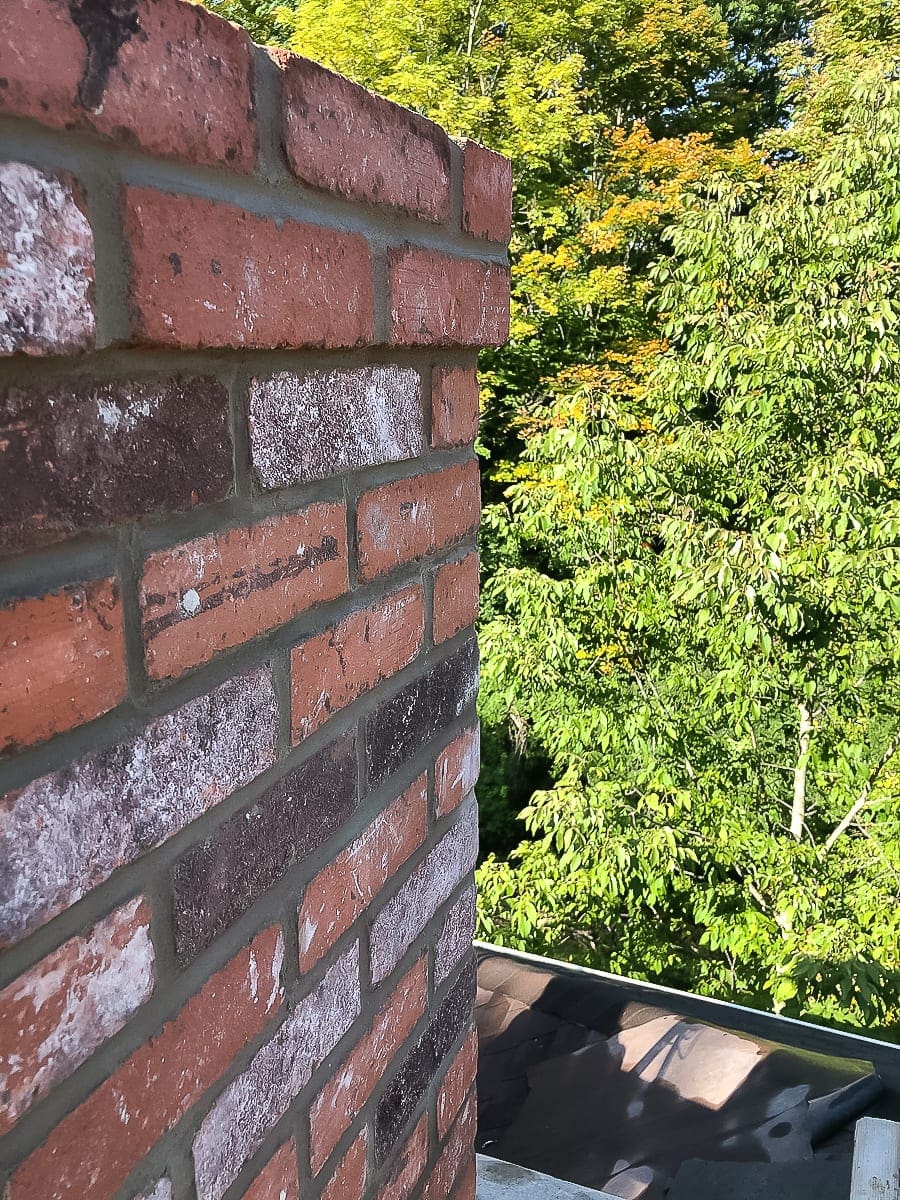
Our step-flashing is new. It is my understanding that the first flashing goes on the tar paper, before the shingles, and slightly up the chimney. Then, the step-flashing alternates with the shingles as you said. Our mason reused the roofer's layer of flashing because it was aluminum and relatively new. He didn't want to disturb what was not broken. We had the roof put on in 2016. At that time, it was a complete tear-off.

I like the way step flashing looks. Our other chimneys just have a thick layer of tar spread all over to prevent leaks. :roll: It's effective, but it looks terrible.

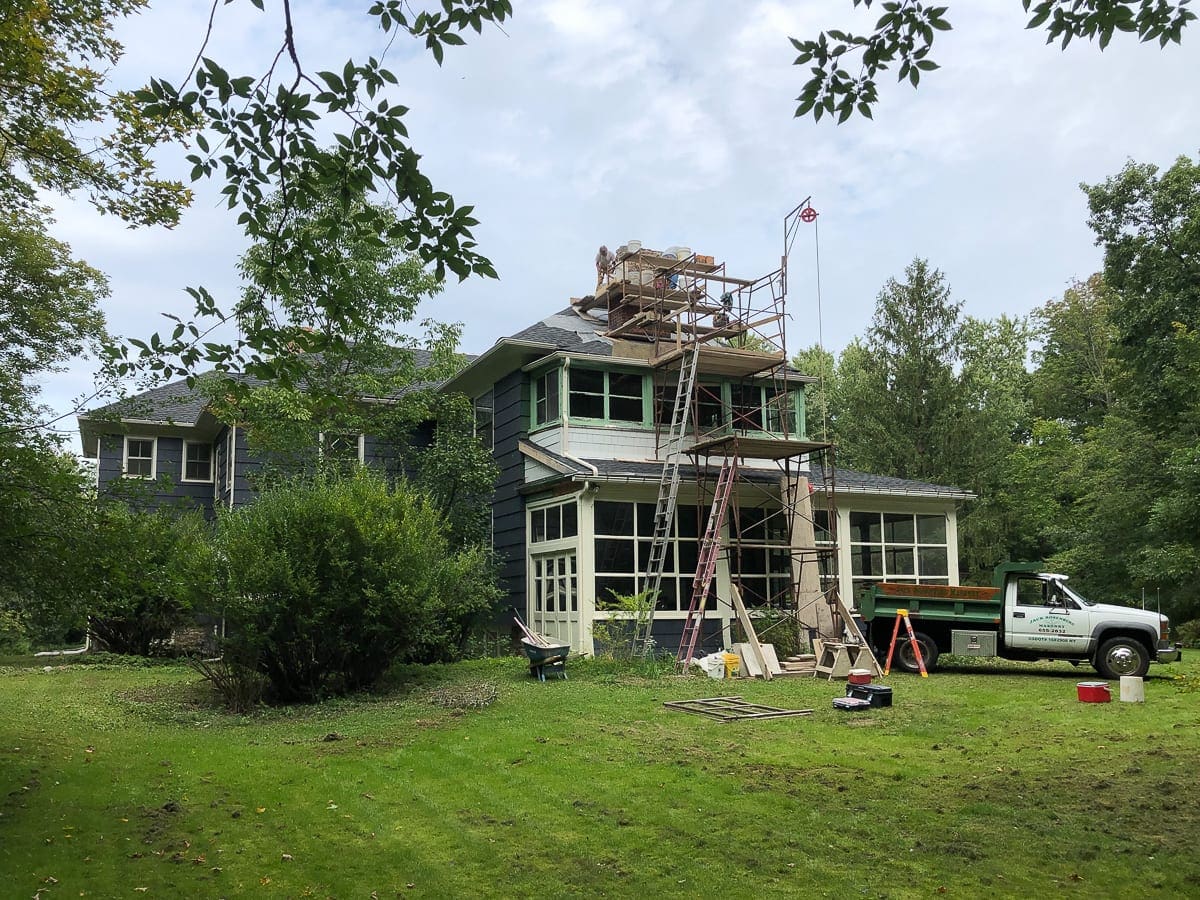
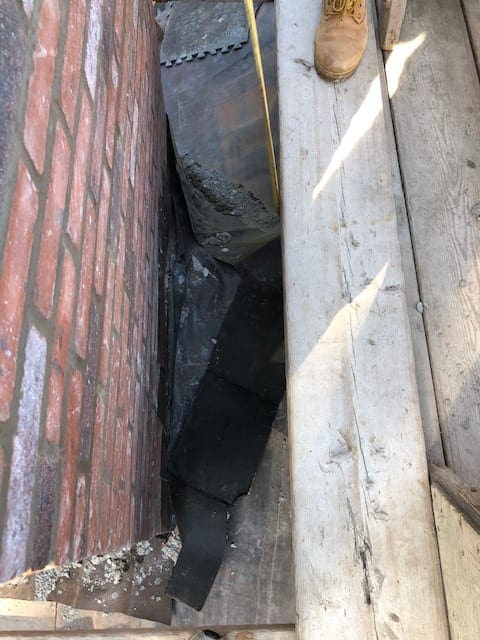
We also have a cricket. This is a terrible shot of it, covered in tarps but if you look closely, you can see the raised portion.
Image


I don't know if that helped at all, but that's how it worked here. If I misunderstood or you have more questions, let me know.
Stacy
Owner and Blogger of our 1880s...um...Colonial? Victorian?
Image

User avatar
GinaC
Forgotten more than most know
Posts: 437
Joined: Sat Jan 26, 2019 8:19 pm
Location: Newport, VT

Re: Three-flue Chimney Rebuild

Post by GinaC »

BlakeHillHouse wrote:Chimney rebuilds are such huge projects. I hope your mason comes back soon. We were lucky to have excellent weather for the entire two weeks, but that was out of the ordinary here.

We will likely be putting in liners too. I'm still trying to decide if I want a gas insert, gas log, or wood-burning insert.


I texted him today and he said he was hoping to get the entire job done next week. I know we are expecting thunderstorms for a few days, so I hope he can work around them.

I decided on a Blaze King wood stove because of the long burn times. I didn't want to have to babysit the thing. I really wanted a Princess, but it wouldn't fit in my fireplace, only the Ashford or Sirocco would. I decided on the Sirocco because my living room is small and it didn't stick out as much. https://www.blazeking.com/products/wood ... irocco-25/
1939 Minimal Traditional

phil
Has many leather bound books
Posts: 4616
Joined: Tue Aug 18, 2015 6:11 pm
Location: Near Vancouver BC

Re: Three-flue Chimney Rebuild

Post by phil »

Thanks Stacy. the step flashing on yours is no doubt fine. there is definitely a bit to know and some techniques and I think its often done incorrectly. for some reason I found it a bit of brain twister in some cases to figure out the sequence of materials, where to place nails and some things vary by area. Where they get more strong wind and hurricanes they need to do a bit more to keep the shingles from blowing off. Some areas have weather where ice dams can happen. Here we get almost constant rain in winter so maybe we need to seal stuff a bit more. Ive noticed some differences in the recommendations when comparing you tube videos. the slope is a factor too. I did 5 nails in each shingle ,but I think most of the commercial roofers do 4, but also most roofs aren't as steep as our old houses usually are. the packages recommend 6 on really steep slopes like barn style roofs. It looks like your mason was well equipped and did a nice job.

User avatar
Gothichome
Moderator
Moderator
Posts: 4184
Joined: Sun Aug 16, 2015 8:34 pm
Location: Chatham Ont

Re: Three-flue Chimney Rebuild

Post by Gothichome »

Stacy, nice to have a secure chimney once again. Those black bricks are those original bricks just relaid good side out, and the flashing, (I know your not a brick layer) I notice they did not trim or fold over the end?

Post Reply