For all of you who aren't following my house blog, I just recently finished a room upstairs, which has been under construction for several years.
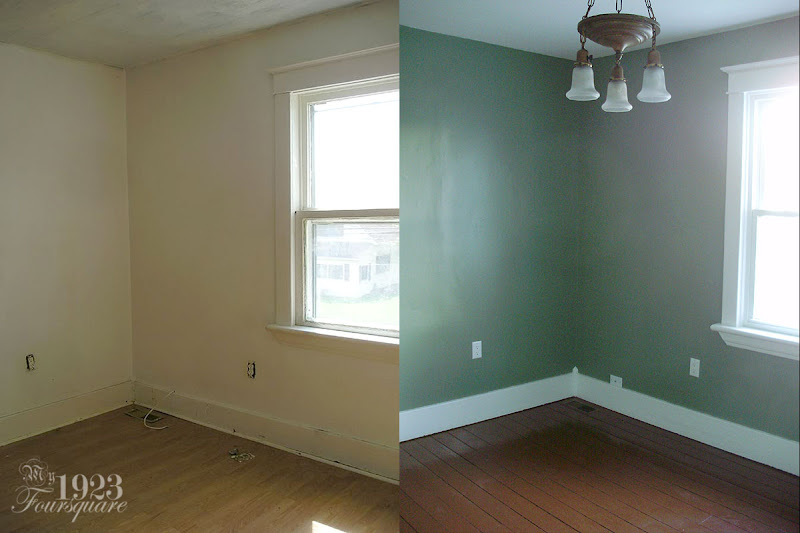
Parts of the renovations included:
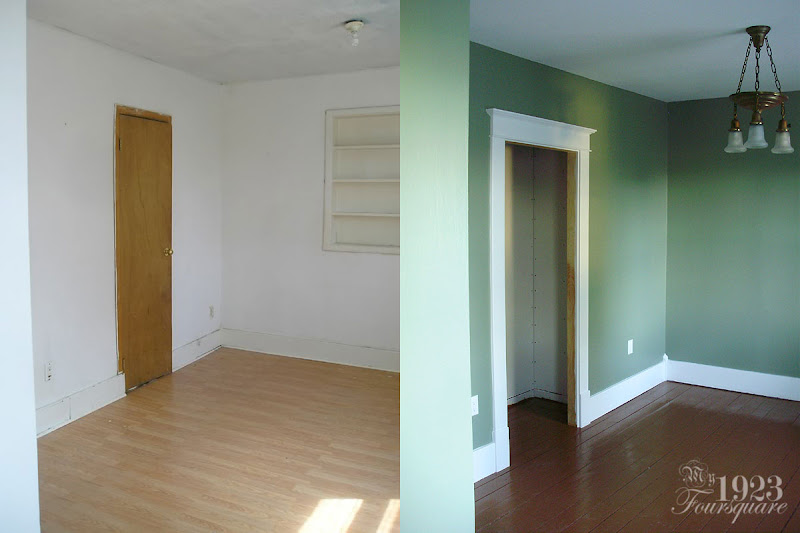
- Rebuilding an entire closet/walls separating two rooms.
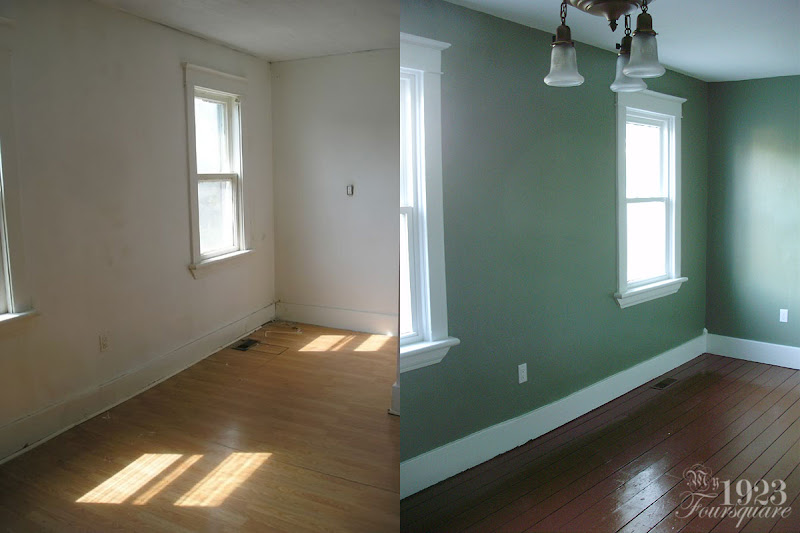
- Removing cheap laminate floor, vinyl tile, linoleum, and plywood, then puttying and repainting the original pine floor.
- Repairing duct work and holes in the original floor (including busted boards).
- Moving a few electrical outlets.
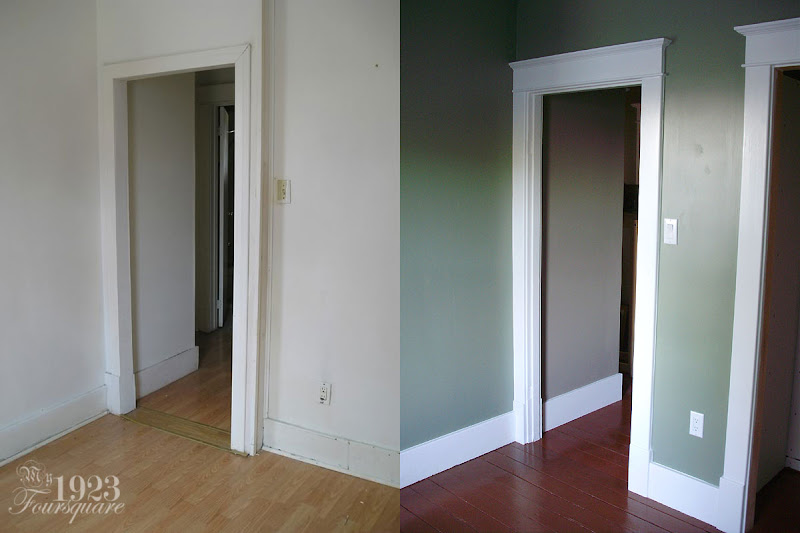
- Replacing missing mouldings.
- Repairing/patching existing mouldings.
- Removing a thick layer of horrifying textured garbage added on the ceiling, followed by a new layer of drywall over this.
- Painting.
- Installing an antique (refinished and rewired) light fixture.
- New windows (before I knew better - back in 2010).
Here are just a few of the before and after photos, and you can see the rest of them with explanations on the post here: http://my1923foursquare.blogspot.ca/2014/06/before-after-photos-l-room.html
Upstairs Bedroom Before & After Photos
- Sooth (WavyGlass)
- Knows the area
- Posts: 77
- Joined: Fri Oct 12, 2012 10:48 pm
- SouthernLady
- Forgotten more than most know
- Posts: 385
- Joined: Tue Aug 18, 2015 3:37 am
- Location: Piedmont region of NC
- Contact:
Re: Upstairs Bedroom Before & After Photos
Oh, that looks lovely! That work was well-worth it, I am sure.
It looks like you have just about the same shade of paint on your walls that I have in part of my house. Love it!
- Sooth (WavyGlass)
- Knows the area
- Posts: 77
- Joined: Fri Oct 12, 2012 10:48 pm
Re: Upstairs Bedroom Before & After Photos
I'm very pleased with the results. This room will actually serve as my clock repair work space. I need to set-up some shelving and tables and organize everything, but it will be nice to have the work space after having most of my things in storage for over 4 years.
The wall colour is actually a colour that my aunt had picked out for her living room in her current house. I absolutely loved the colour, so she gave me a sample, the name, and I used the same colour. It's a "medium" shade, but looks a bit dark depending on the lighting.
The colour is Behr's "Olivine" and it is still one of their current colours. It goes on looking rather olive and depressing, but after the second coat, and some drying, it looks more like a moody/soft emerald or forest green.
-
- Been here a good while
- Posts: 229
- Joined: Sat Aug 29, 2015 12:01 am
Re: Upstairs Bedroom Before & After Photos
The changes look really nice. The moulding changes and the floors like great!
- Gothichome
- Moderator
- Posts: 4188
- Joined: Sun Aug 16, 2015 8:34 pm
- Location: Chatham Ont
Re: Upstairs Bedroom Before & After Photos
Looks great Sooth,
- Neighmond
- Moderator
- Posts: 1070
- Joined: Mon Aug 17, 2015 5:15 pm
- Location: Rural Emmet County Iowa
- Contact:
Re: Upstairs Bedroom Before & After Photos
That green will be restful on the eyes when you are doing clocks in there, too. I usually don't light any more than I have to in the room, and a nice soft dazor type light over my work, and that helps cut down on eye stress. How will you flyaway proof the floor? I can see a cannon pinion or gathering pallet or something equally troublesome to replace making its way between the boards.
-
- Knows where blueprints are hidden
- Posts: 968
- Joined: Sat Jan 16, 2016 5:50 pm
Re: Upstairs Bedroom Before & After Photos
Neighmond wrote:That green will be restful on the eyes when you are doing clocks in there, too. I usually don't light any more than I have to in the room, and a nice soft dazor type light over my work, and that helps cut down on eye stress. How will you flyaway proof the floor? I can see a cannon pinion or gathering pallet or something equally troublesome to replace making its way between the boards.
I can see a large, flat-oloured rug in the future of this room
I once spent a week at a computer repair shop and they had a large (think commercial-sized) doormat on the tile floor surrounding the work space so falling screws and other small items wouldn't bounce off the floor, flying across the room.
- Sooth (WavyGlass)
- Knows the area
- Posts: 77
- Joined: Fri Oct 12, 2012 10:48 pm
Re: Upstairs Bedroom Before & After Photos
Yes, I imagined I'd need to do something like this too. I truly hate carpets and rugs though, so I'd appreciate any suggestions. I don't want anything with too much pile, and I don't necessarily want a seagrass mat either.
- Sooth (WavyGlass)
- Knows the area
- Posts: 77
- Joined: Fri Oct 12, 2012 10:48 pm
Re: Upstairs Bedroom Before & After Photos
Actually, scratch that idea completely. I'm probably going to do a painted floor cloth. I picture something like this, but likely with browns, reds, gold, or green tones rather than blue.
-
- Knows where blueprints are hidden
- Posts: 968
- Joined: Sat Jan 16, 2016 5:50 pm
Re: Upstairs Bedroom Before & After Photos
Whatever you do, it needs to be soft enough to catch falling parts instead of bouncing them off and it should be more or less flat so small items can't hide. Shagpile is definitely out of question, as are flokati rugs
At the computer shop they had a dark grey (almost black) doormat, maybe 3'x5' in size with an almost flat surface and rubber bottom.