The long road back

Part of the former WavyGlass.org site. Threads for member introductions and where members had threads devoted to their own houses for showing off their pride and joy!
2ndline
Settling in
Posts: 24
Joined: Sun Jan 03, 2016 3:39 am

Re: The long road back

Post by 2ndline »

wletson wrote:Its neat that you can give the entire history of the house like that. It's that easy for me too, but that's because it was a school house for 80 years of its life.
Your profile says you're from Milton. I'm half an hour down the highway. You can actually see my place from the 401


I remember, we were discussing Chris Cooper on OHW. I took his masonry restoration course at the house.

Haven't heard from him lately...

2ndline
Settling in
Posts: 24
Joined: Sun Jan 03, 2016 3:39 am

Time for an update

Post by 2ndline »

So what was supposed to be a quick 2 week project turned into 7 months. I didn't work on it much during the cold winter so that slowed progress, but got rolling again in the spring.

Once the walls were done it was time for window and trim.

Image

Image

Image

2ndline
Settling in
Posts: 24
Joined: Sun Jan 03, 2016 3:39 am

Re: The long road back

Post by 2ndline »

I have restored 6 sets of sashes, and I don't think I am any better at it than when I started. I is usually a whole weekend to strip, sand re-glaze and prime 1 set for me. Makes me question my saving the old sashes when I know I still have 17 sets left to go.

Image

Image

Image

Image

Pretty satisfying when they are done though.

2ndline
Settling in
Posts: 24
Joined: Sun Jan 03, 2016 3:39 am

Re: The long road back

Post by 2ndline »

I wanted to keep the original shelves and they were a ton of work. A lot of the parts were well mouse eaten so I got a carpenter friend to copy them for me. Since this room was done I have bought a router table and cutters and figured it out for myself.

Image

Image

Image

There were several coats of paint but the cream color was so hard and did not sand easily. When I got down to the first coat I took a piece to the paint store and they scanned it so I could paint the trim the original color.

Image

Image

Image

Image

It was really hard to take good pics in such a small room. A couple of cool things I found during the resto was beside the shelves which had pulled away from the wall. there was about 20 pieces of real silverware that had fallen down between the wall and the shelf. I also noticed on the bottom of the shelves were many scorch marks from were someone had put a candle or lamp while looking for something in the pantry while it was dark. I kind of hated to paint over the history, but I don't know if anyone else would even give them a second thought.

User avatar
Don M
Moderator
Moderator
Posts: 1646
Joined: Sun Aug 16, 2015 10:19 pm
Location: S. Central Pennsylvania
Contact:

Re: The long road back

Post by Don M »

More pictures & information---Welcome too!

User avatar
Powermuffin
Forgotten more than most know
Posts: 444
Joined: Tue Aug 18, 2015 5:19 pm
Location: Beautiful Colorado

Re: The long road back

Post by Powermuffin »

I love reading your house story. Keep it comin', please.
Diane

2ndline
Settling in
Posts: 24
Joined: Sun Jan 03, 2016 3:39 am

Re: The long road back

Post by 2ndline »

The pantry turned out really well, I was super happy with the results, but what to work on next? With the wife to be off work again to have our 3rd, she wanted to be able to continue working part time from home as a hairdresser. We had this large closed in porch the previous owner had put on we didn't know what to do with, and it was really ugly and unfinished inside. So I decided to turn it into a hair salon, but wanted to make it so I could back into a regular room without a ton of work.

First I had to demo the half wall around the one set of basement stairs.

Image

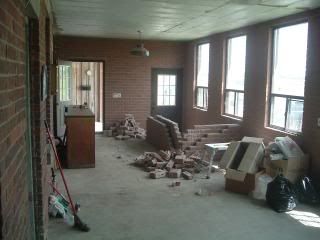
The brick wall to the right is the former exterior wall of the south side of the original house. the stone wall at the far end is the back wall of the addition put on the front 1856.

Image

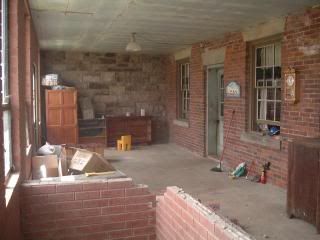
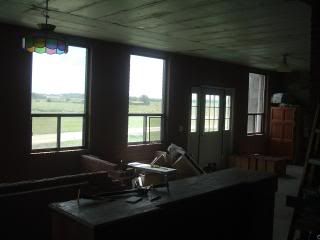
When the porch was built they used some ugly commercial aluminum windows. I didn't have the budget to change them at this point, that will have to wait until I redo the outside.

Image

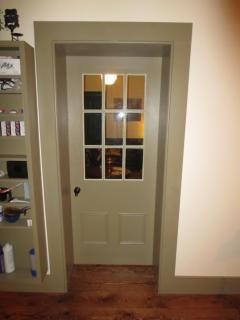
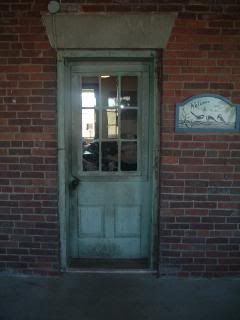
This was the original front door before the front was added. It continued to be used quite heavily for the next 150 plus years and was in tough shape. the light in the door was put in at some point early in the last century, I don't know where it came from but it was just hacked in. They used 1x3 pine on the outside and used about 30 various screws, nails, roofing nails etc. to hold it in. Because they cut the center stile out of the door it sagged of course, so I took it to my carpenter friend and he disassembled the whole door, squared it up and tightened the tenons and mounted the light (window) properly.

Image

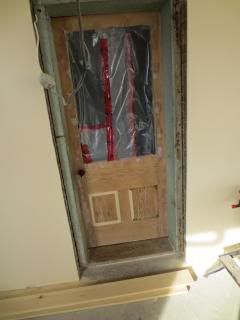
I had to strip and sand the door and restore and reglaze the sash? before I sent it out.

Image

Looked pretty good when it was done. I had to extend the door frame out to meet the casing. I didn't want this room like a poorly executed addition stuck on the side of the house so I copied the casing and baseboard from the pantry out of pine like the original.

Image

User avatar
Don M
Moderator
Moderator
Posts: 1646
Joined: Sun Aug 16, 2015 10:19 pm
Location: S. Central Pennsylvania
Contact:

Re: The long road back

Post by Don M »

Beautiful job; you would never know that it was an old hacked up door!

User avatar
kelt65
Stalwart
Posts: 365
Joined: Mon Aug 17, 2015 2:50 pm
Location: New Orleans, LA
Contact:

Re: The long road back

Post by kelt65 »

Great house. Those floors don't really look bad - they're nice and tight at least. Resurfacing them is not difficult. You certainly have a lot of work to do, but that place is very much worth it.

2ndline
Settling in
Posts: 24
Joined: Sun Jan 03, 2016 3:39 am

Re: The long road back

Post by 2ndline »

When I started on the porch, the ceiling was blue polystyrene board that was put in when they poured the roof slab, so I had to tapcon furring strips to attach the drywall. Drilling 300+ holes overhead with a hammer drill into the concrete is enough to make your arms fall off! I studded and insulated the exterior brick wall and put the drywall right on the brick on the interior wall.

Image

I also had to create all the trim since there wasn't any. I had not really done any of this stuff before so I learned as I went along, Making the odd test piece to make sure my machine setups and measurements were right.

Image

Image

Image

Since you don't usually have interior windows, the only thing I could think to do would be to make the former outside look the same as the inside. The end result worked well.

Image

Locked