Re-caulking and Spiffing my Old Tub

Part of the former WavyGlass.org site. This was the place to share the knowledge accumulated.
Locked
User avatar
Carmify (WavyGlass)
Knows the area
Posts: 61
Joined: Sun Feb 17, 2013 4:52 pm

Re-caulking and Spiffing my Old Tub

Post by Carmify (WavyGlass) »

This bathroom had sliding glass shower doors but I wasn't happy with them. You can't ever clean them well enough, the air doesn't circulate, and mildew always wins! I prefer a shower curtain, so here's my step by step:
I removed the doors from their tracks:

http://i1322.photobucket.com/albums/u56 ... 1364413239Image

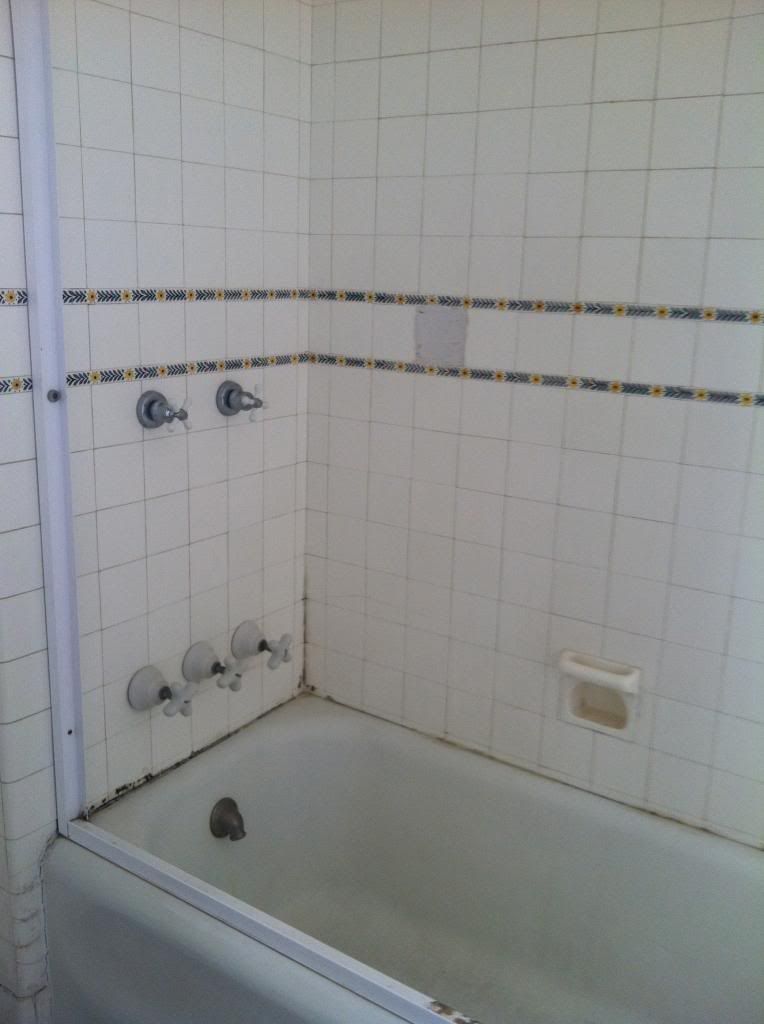
Apologies for the grainy photo. I don't know why that one tile is missing but someone smeared cement in its place. Removing the tracks was as simple as unscrewing them. Underneath was a bunch of silicone caulk and mildew, and the bottom of the tub really was that grey color.

Image

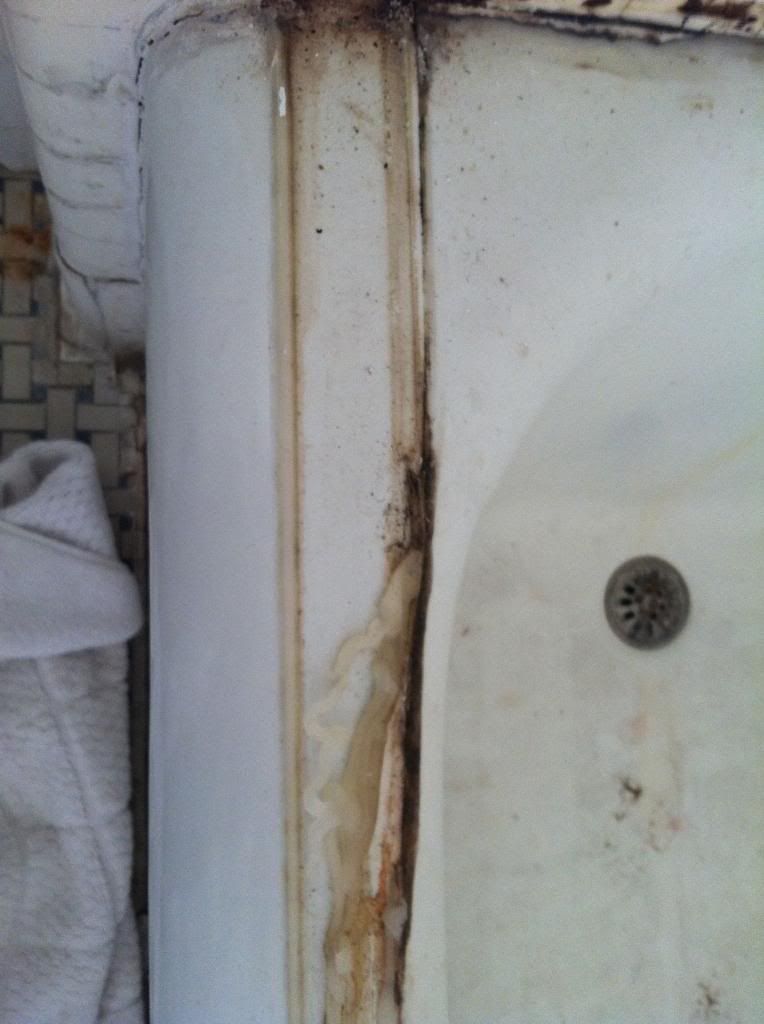
A razor-blade scraper actually took off almost all of the caulk on the tub and tile. I also used Goof-Off but I'm not sure how effective it was. I used chisels and the razor-scraper to clean out the caulk between the tile and the top of the tub.

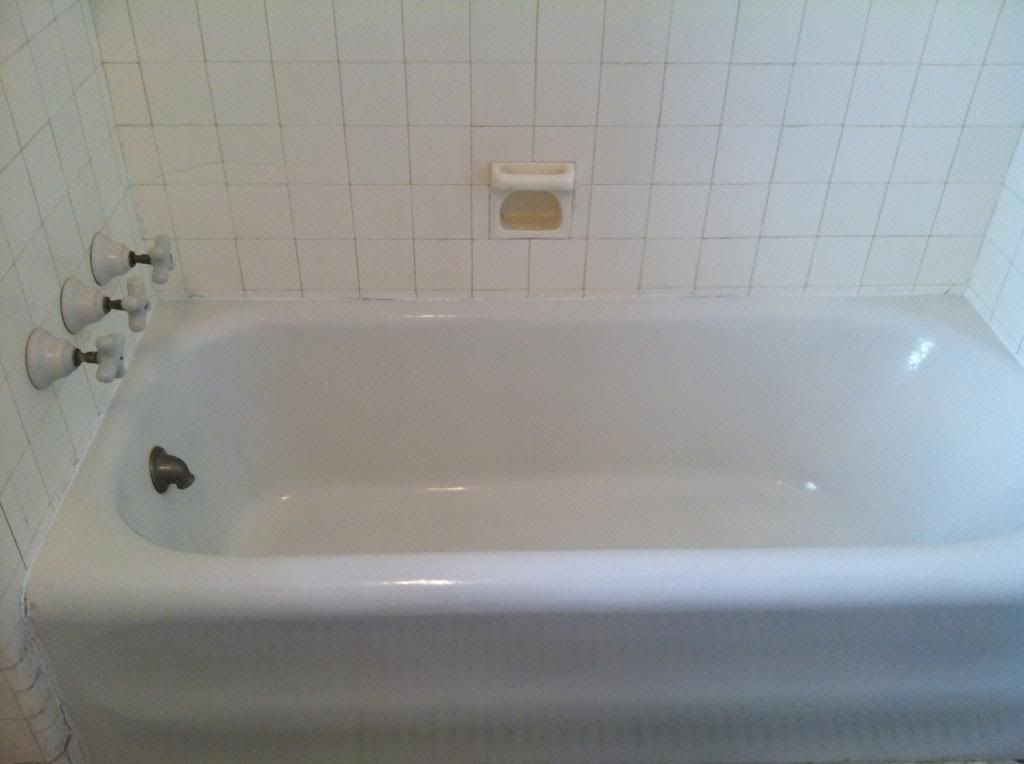
On to cleaning the tub itself! I tried a number of things I'd read about online: 20 Mule Team Borax, white vinegar, vinegar & Dawn, and it was looking pretty grim, until finally--ta daaa-- Mr. Clean Magic Eraser. It worked like a charm. I need to buy a case of these things.

For new caulk, I used GE Silicone II in White. I read about a method where you apply tape around where you want your caulk line. That way you get a nice clean line when you pull the tape off. I am SO glad I did this because the caulk would have been a mess otherwise--seriously, the stuff oozes like frosting and gets everywhere.

Image

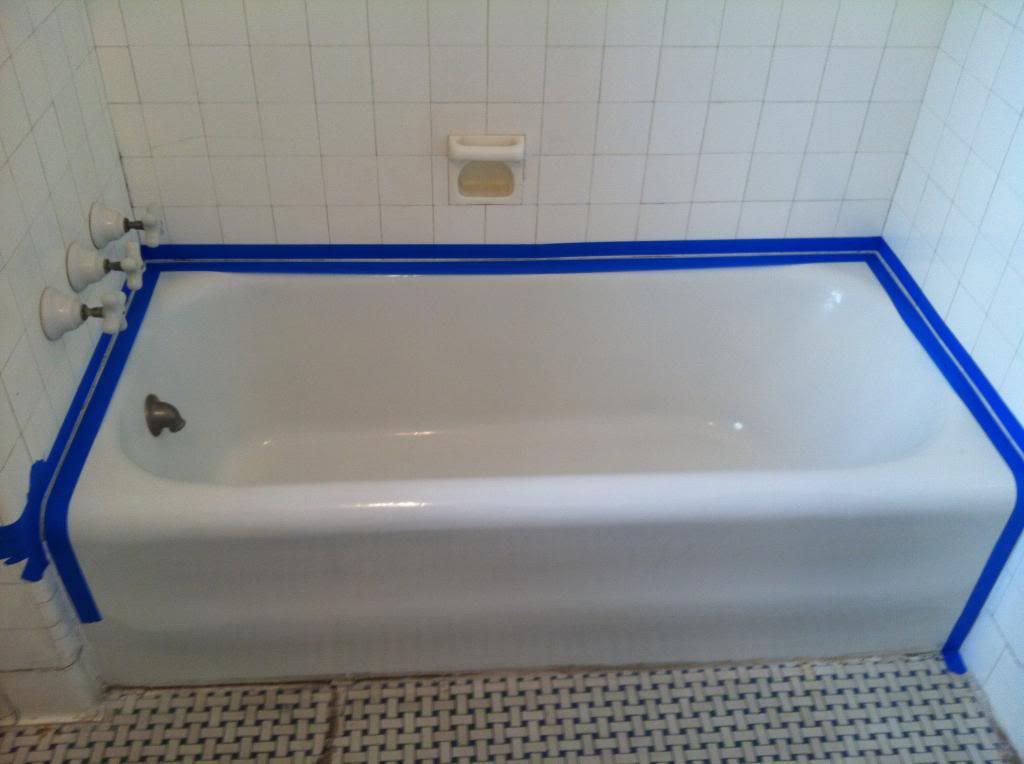
New caulk-- It's not perfect but whenever I take on one of these projects, I tell myself it's got to be better than where it started! I caulked up the six or so old holes in the tile, leaving the wall-anchors in place but shearing them off flush with the tile first (razor scraper).

Image

All that was left was drilling holes in the tile for wall anchors, to hold the new shower curtain rod. I found out the hard way that you need a special drill bit for tile. After I bought the special bit, and a replacement wood bit (duh) it went well--but still slow. I'd thought the walls were plaster & lath but they are plaster over some really thick metal mesh. I ended up cutting the wall-anchors a little shorter and using shorter screws than the ones that came with the rod. It still feels pretty solid.

Image

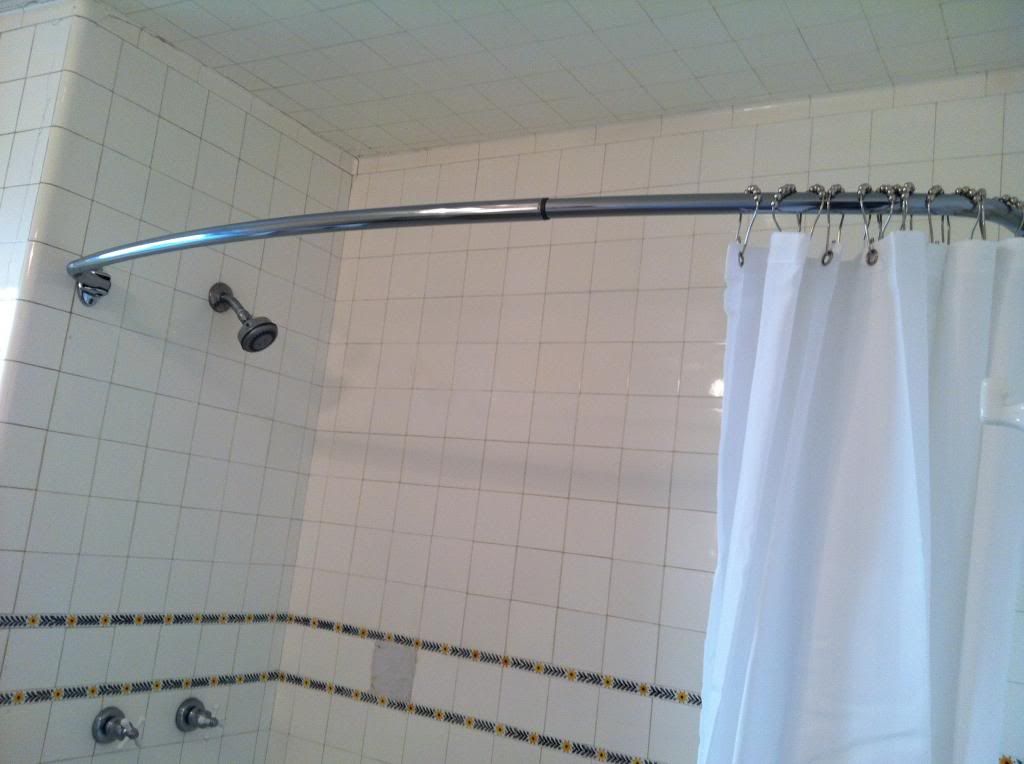
It's one of those nifty curved shower rods, for more elbow room. :D
Carm--my Renovation Diary at carmify.tumblr.com

wletson
Been here a good while
Posts: 259
Joined: Fri Aug 21, 2015 10:54 pm

Re: Re-caulking and Spiffing my Old Tub

Post by wletson »

nice work! I love the detail lines of tile.
Warren

mattswabb
Shakes a cane at new house owners
Posts: 544
Joined: Sun Aug 16, 2015 8:33 pm
Location: Elyria Ohio
Contact:

Re: Re-caulking and Spiffing my Old Tub

Post by mattswabb »

Looks nice. Many would have ripped it out and started new.

SkipW
Forgotten more than most know
Posts: 436
Joined: Fri Sep 25, 2015 11:08 pm

Re: Re-caulking and Spiffing my Old Tub

Post by SkipW »

Great job! I don't know how long it took, but it sure was worth it from the pictures.
Etta says "WOOF"

User avatar
Lauren674 (WavyGlass)
Been here a while
Posts: 135
Joined: Fri Oct 12, 2012 3:27 pm

Re: Re-caulking and Spiffing my Old Tub

Post by Lauren674 (WavyGlass) »

Looks great! We did this same job on the 2nd floor tub: out with the shower door and in with the curved rod. The tub edge looks so nice without the ugly track. We actually did buy a case of those magic erasers. I think we also encountered the mortar mesh (?) when drilling the tile. Hubby did that, he knew about the drill bits.
Present: Image and long, long ago:Image
Lauren
Restoring our 2nd Generation in-the-family Bungalow
http://www.pbase.com/lauren674/root

lisascenic
Stalwart
Posts: 340
Joined: Sun Nov 15, 2015 5:55 pm

Re: Re-caulking and Spiffing my Old Tub

Post by lisascenic »

Very nice!

And very eco-friendly!

jtjgvle
Just Arrived
Posts: 6
Joined: Wed Nov 25, 2015 3:06 pm

Re: Re-caulking and Spiffing my Old Tub

Post by jtjgvle »

looks great i am definitely going to attack my tubs with a magic eraser and see what
happens!

lisascenic
Stalwart
Posts: 340
Joined: Sun Nov 15, 2015 5:55 pm

Re: Re-caulking and Spiffing my Old Tub

Post by lisascenic »

Go easy with the magic erasers.

They can be very damaging to gloss surfaces like ceramics.

maxhall1023
Knows the back streets
Posts: 88
Joined: Fri Aug 28, 2015 4:31 am
Location: Western MA

Re: Re-caulking and Spiffing my Old Tub

Post by maxhall1023 »

Great looking curtain rod I really need to get one of these. Screw waiting for the remodel of the bathroom. I also need to re-caulk or tub as well. Probably use Big stretch caulk, I've had pretty good success with that brand of caulk.

Locked