Making a 'Dutchman' Wood Repair
Posted: Sun Mar 03, 2013 11:57 pm
I learned this technique last year in my preservation field school class (College of the Redwoods, Eureka CA), thought I would share it.
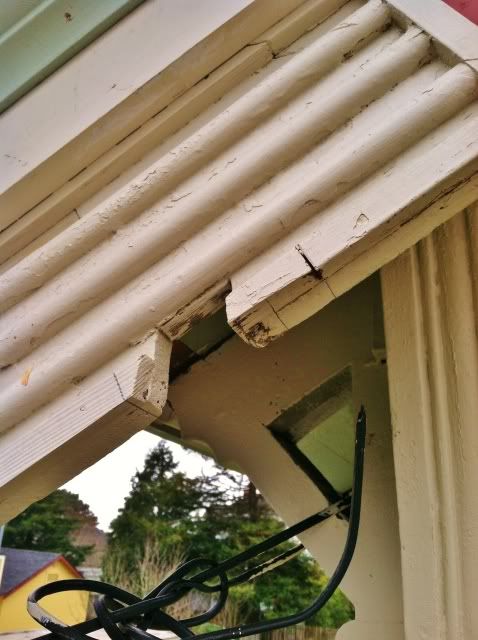
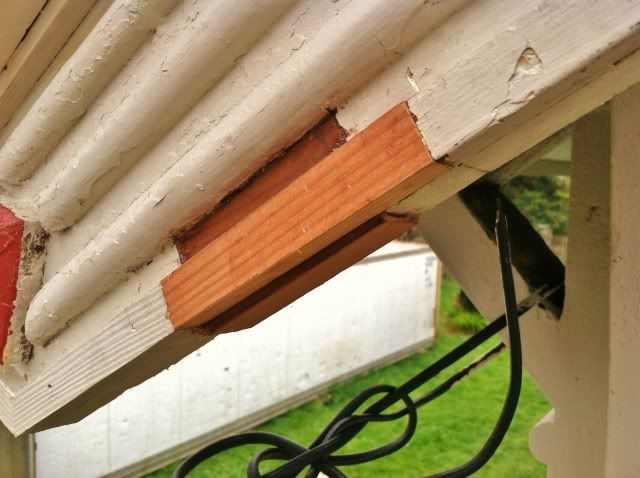
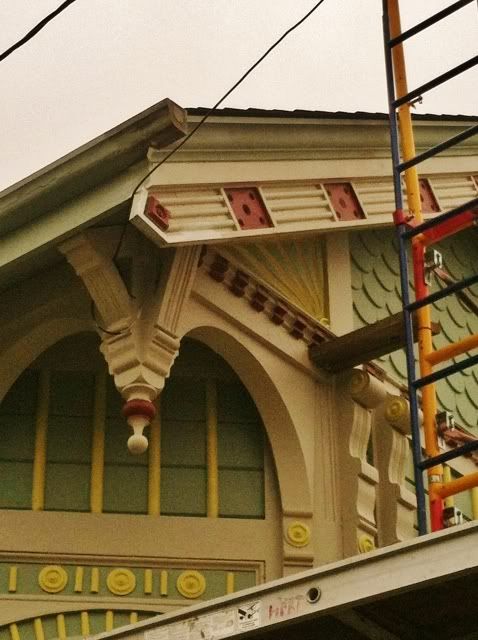
There was a notch hacked into the front bargeboard of our 1892 project house, the "Annie B. Ryan".
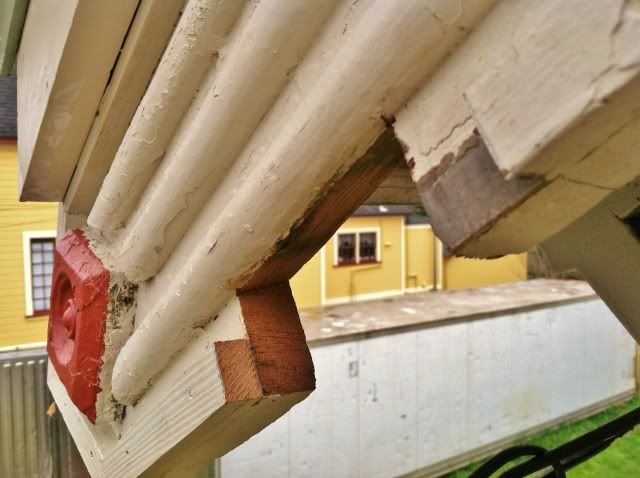
I started by marking square lines around the opening to make the patch fit easier.
I cut the opening back to good wood (especially important if you're patching a rotten section) using handsaws and chisels.
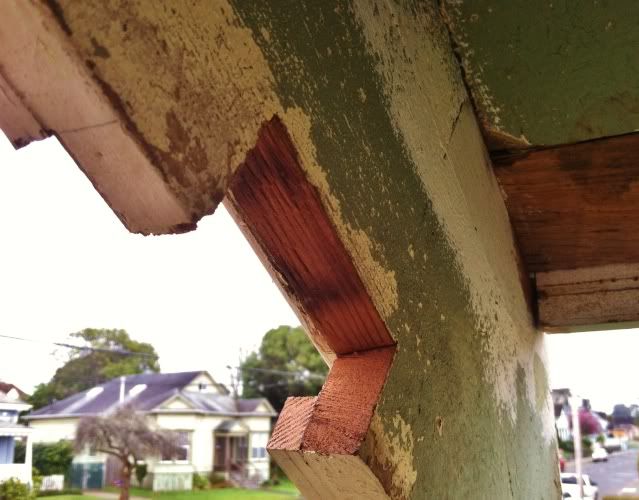
Next I measured the openings and cut new pieces to fit. You should always use "in-kind" materials for patches, so the wood expands and contracts the same. In this case, old growth redwood with similar grain density (ring count) and orientation.
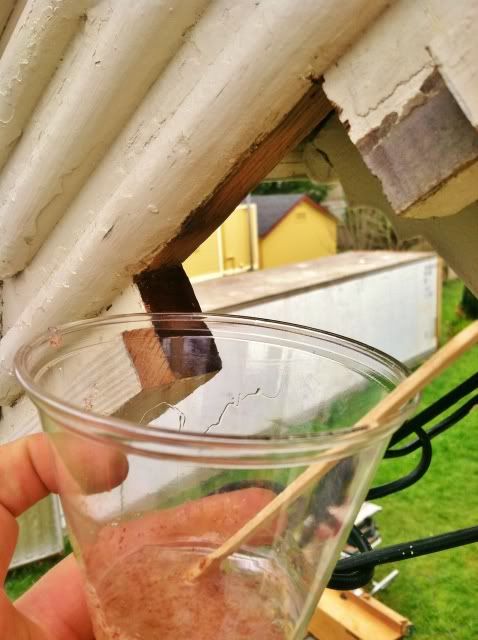
I prefer to use 5 minute epoxy, as it is very strong, sets rock hard in 15 minutes, and can fill voids better than wood glue. (I believe wood glue can work too though, just make sure it's good for exterior use if the repair is outside.) If the fit is a little sloppy, you can add some sawdust to build up the resin body.
Oh, and wear gloves with epoxy. I was bad in this picture
Here are the pieces epoxied, note that I left the new pieces a little proud of the surroundings.
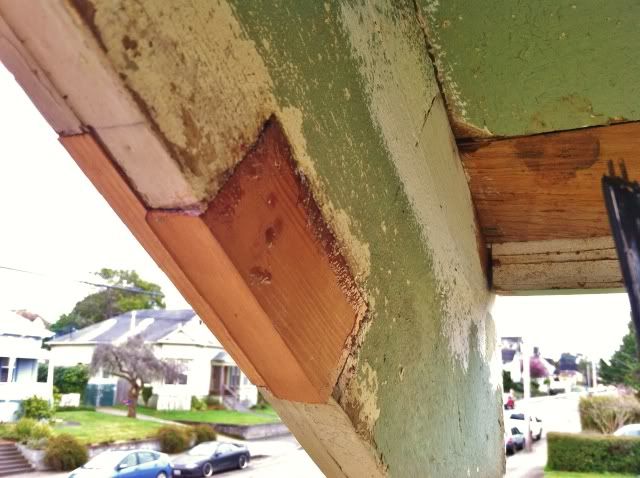
Grab a coffee and wait for it to harden for a bit. I find it is plenty hard and ready to continue after 20-30 mins. Using knifes, chisels and a block plane, I eased the new wood down to flush and removed any epoxy squeeze out.
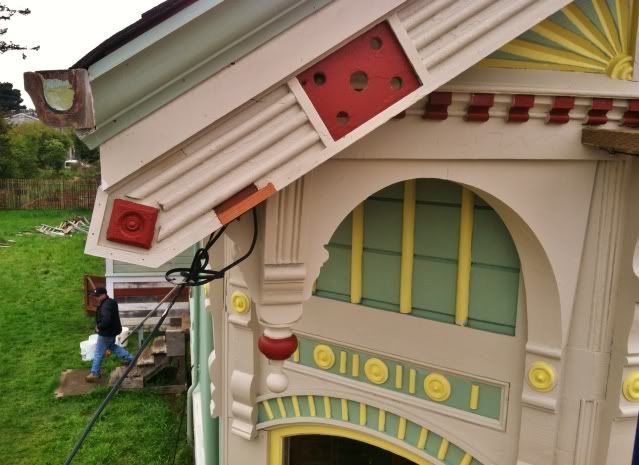
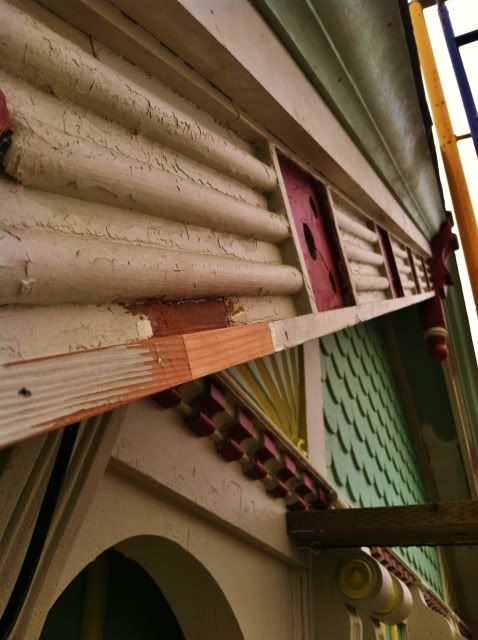
A little sanding, filler if needed, and primer, and it's ready for paint.
After some practice, these can be done pretty quickly. They can really save a lot of work vs. replacing a whole piece of trim. They can be done to repair floors and stain grade wood too, but it takes a careful eye and more skill.
Hope you enjoyed!
There was a notch hacked into the front bargeboard of our 1892 project house, the "Annie B. Ryan".
I started by marking square lines around the opening to make the patch fit easier.
I cut the opening back to good wood (especially important if you're patching a rotten section) using handsaws and chisels.
Next I measured the openings and cut new pieces to fit. You should always use "in-kind" materials for patches, so the wood expands and contracts the same. In this case, old growth redwood with similar grain density (ring count) and orientation.
I prefer to use 5 minute epoxy, as it is very strong, sets rock hard in 15 minutes, and can fill voids better than wood glue. (I believe wood glue can work too though, just make sure it's good for exterior use if the repair is outside.) If the fit is a little sloppy, you can add some sawdust to build up the resin body.
Oh, and wear gloves with epoxy. I was bad in this picture
Here are the pieces epoxied, note that I left the new pieces a little proud of the surroundings.
Grab a coffee and wait for it to harden for a bit. I find it is plenty hard and ready to continue after 20-30 mins. Using knifes, chisels and a block plane, I eased the new wood down to flush and removed any epoxy squeeze out.
A little sanding, filler if needed, and primer, and it's ready for paint.
After some practice, these can be done pretty quickly. They can really save a lot of work vs. replacing a whole piece of trim. They can be done to repair floors and stain grade wood too, but it takes a careful eye and more skill.
Hope you enjoyed!