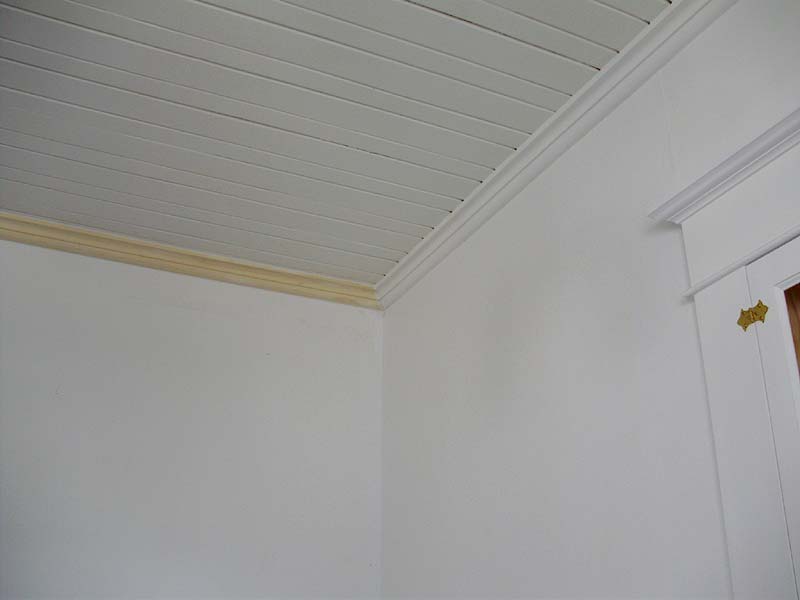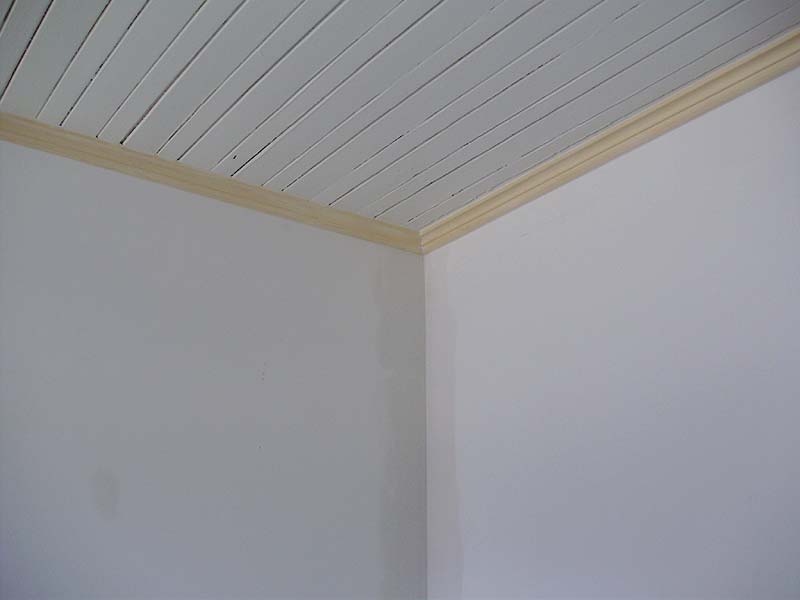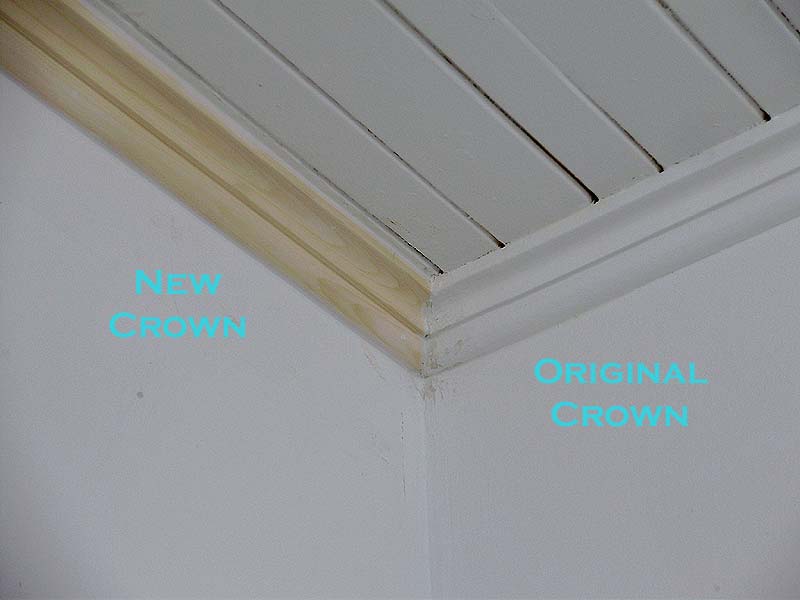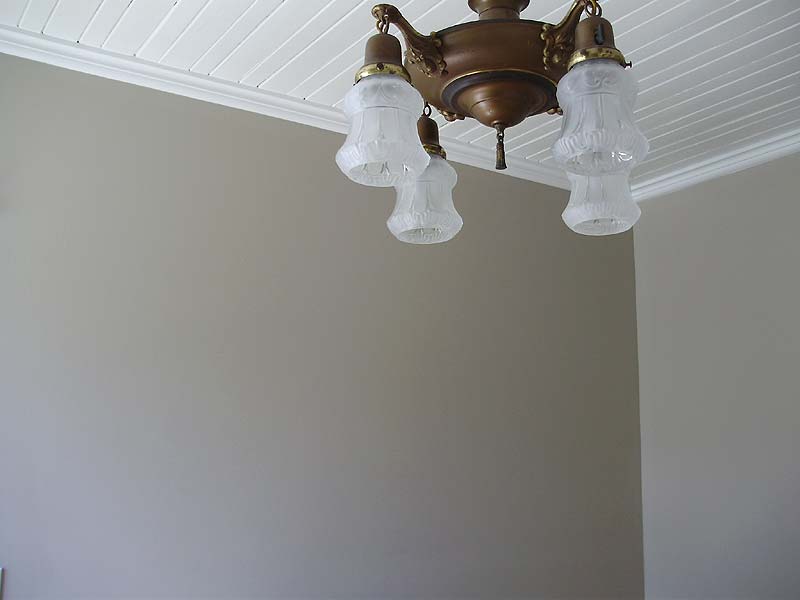
As old house owners, many of us have faced the problem of missing/damaged historic trim/woodwork/mouldings. My home was no exception. When I first purchased the house, I knew that a lot of the trim was missing (95% of all the trim for the interior doors + several lengths of crown moulding). NONE of these profiles were available new. I could get some that was CLOSE, but I wanted as close as possible to exact matches for all of the trim. What can I say, I'm a perfectionist. In the rooms that were missing ALL the crown, I substituted with a new profile that matches the existing casings well, but in the living room and office, I wanted to match the crown since 60% was intact.
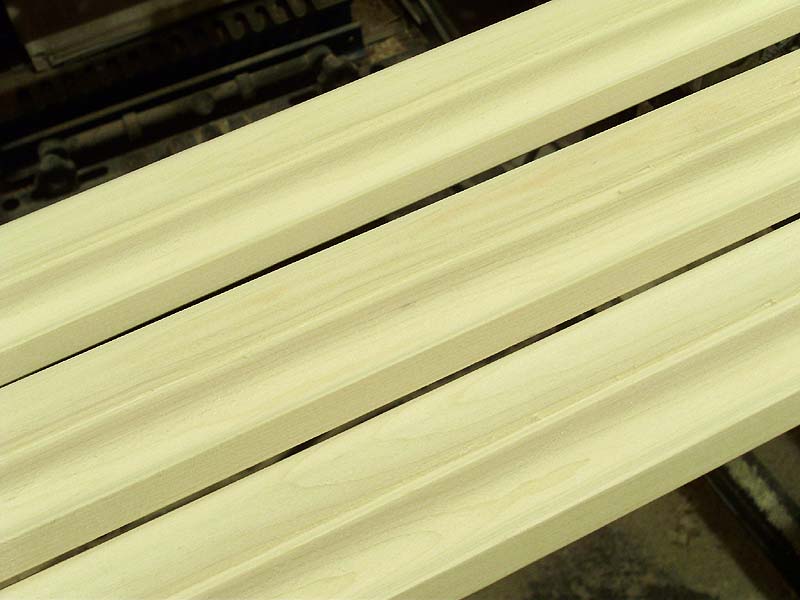
The trim for the doors/windows was a huge pain to make, involving several hours of setups and milling, using 2 different specialty router bits (all done at work with an auto-feed shaper):
These tools aren't really available to most people, but I just want to show what can be done (with the right tools in a professional shop).
This tutorial deals with a simpler moulding, which is the original "Classic Roman Ogee" moulding. These were originally in all the rooms on the main floor of my house (currently the only pieces left are in the living room and office).
Reposted from my Blog:
Today's post will be one of those posts where I'm going to be putting out all the details for this DIY, but I honestly can't picture many people ever going through the trouble to actually DO this. I have seen in the past on a few of the blogs I follow, where some people have made their own mouldings to match one or two missing boards, but it's rare. These days, most people tend to pick one of these two options instead:
- Buy whatever stock moulding is "close enough".
- Pay through the nose for custom milled exact reproduction trim to be made.
There are always other options, too, such as replacing all the trim to make it match, or salvaging old trim, but those are not always convenient.
That said, the point that I'm trying to make is that it's really not THAT HARD to match some mouldings. Especially if you only need a few pieces, and you have basic woodworking skills.
Although I'm a professional cabinetmaker and I've been working with wood for over 10 years, I am still confident that most people can do this particular project.
Tools:
As some of you already know, I'm pretty broke, and I don't really have the best tools in my shop (yet). I have a very flimsy (old) table saw, and the only other two tools I used for this project were a router (and 2 bits: V groove, and 45 degree chamfer), and a small hand plane. You will also need clamps for your table saw set-ups.
I've been putting off this project for MONTHS, simply because I was hoping to find an easier way to make this crown other than by hand. But now that it's done, I'm really wondering why I didn't do it much sooner, because it didn't take long, it looks good, and it was easy.
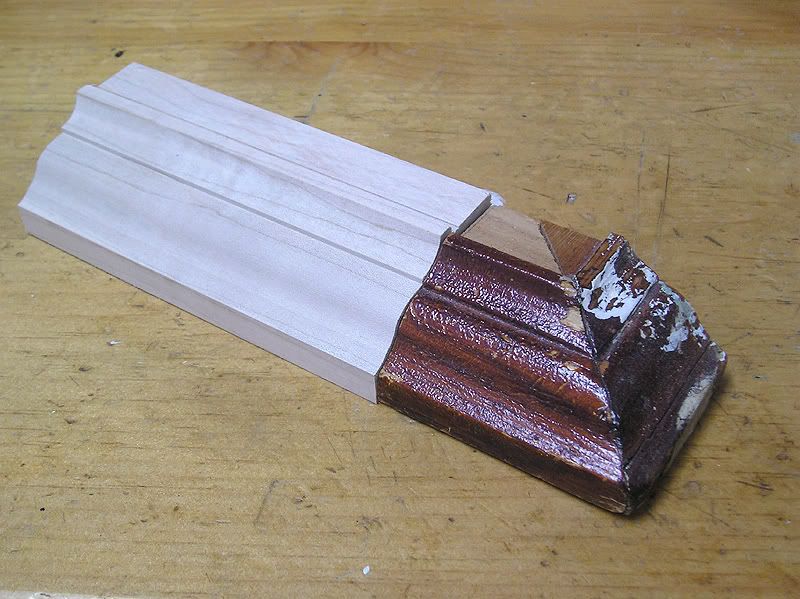
I started by just very quickly making a short piece of the crown (a sample) in MDF to see how close I could get it with just a few quick cuts on the table saw.
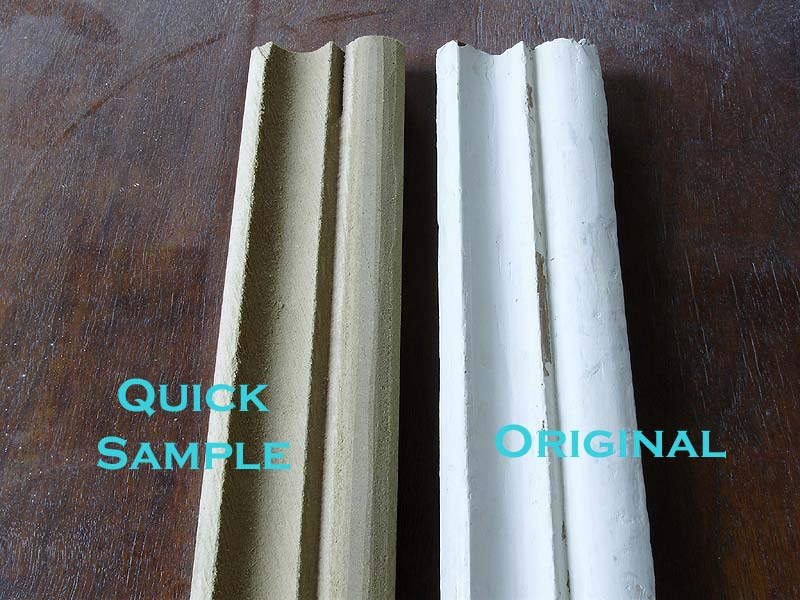
From my sample, I could tell that the moulding will be close enough (that I won't even notice a difference), and that I could improve several of the cuts on my finished mouldings.
Theory:
If you own a table saw, you may not know that it can be used to make some interesting mouldings. You can buy moulding cutter heads, but that's not what I'm referring to.
By running boards into the blade from an angle (even up to 90 degrees: sideways into the blade), you can recreate just about any imaginable curved cut. Passing a board at a slight angle will give a deep profile, and passing it at 90 degrees would give you a very shallow profile.
Things to note: When cutting this type of moulding, you need guide rails on BOTH sides of your board to keep it at the correct angle, and to avoid any possible accidents. You also want to take shallow passes. Since I was using pine, I only did 2 passes, but if you were making mouldings in a hard wood such as maple (which I've had to do before), you may need to make up to 10 passes. USE A SHARP BLADE, and USE A PUSH STICK.
Also: don't be terrified to do this. I know it might sound crazy to want to push wood into your saw blade at an angle, but this is a "tried and true" technique used by thousands of carpenters, and as long as you're careful it's very safe, and it won't ruin your saw.
I described this process in an old post back in 2011, when I fixed the original siding in the porch. You can have a look at that tutorial (and photos) HERE.
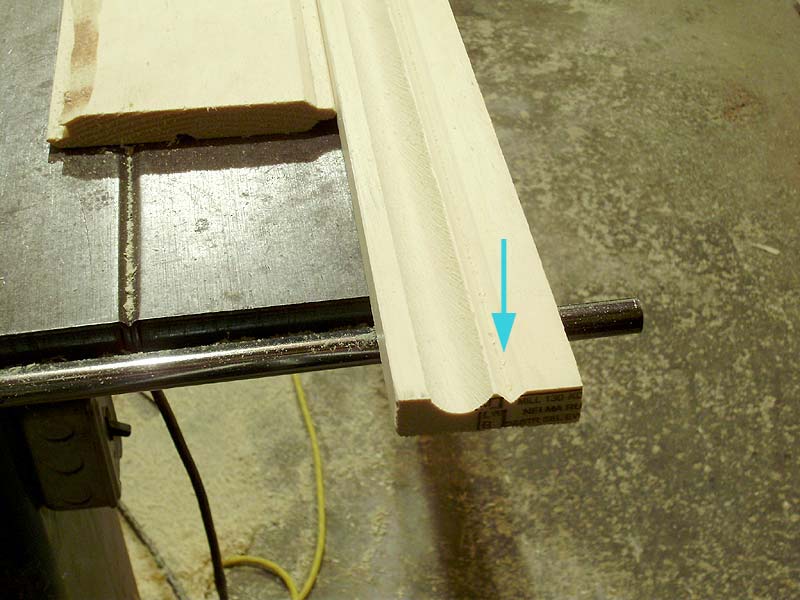
Step 1:
Using a piece of your original moulding (you need an actual sample to work with), set up your saw for the full depth cut of your coved profile cut.
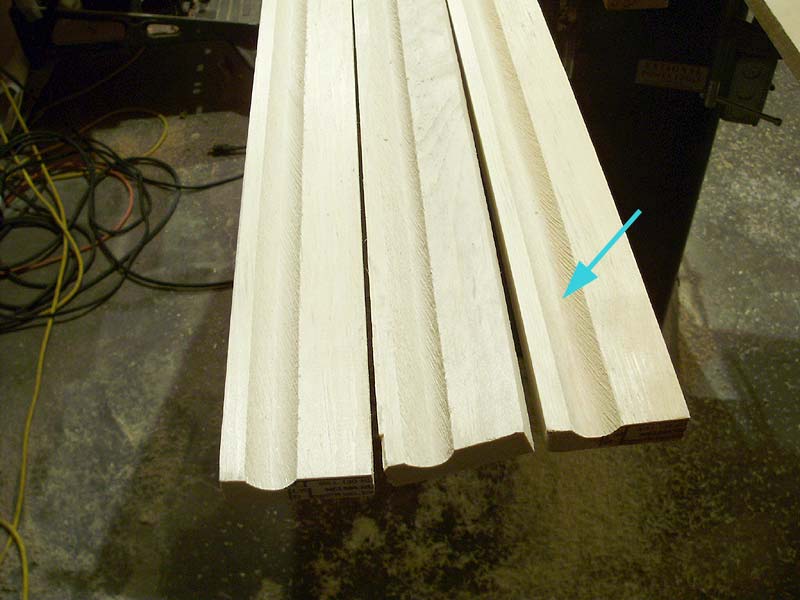
Set up both your fences leaving enough slop to be able to gently slide your moulding stock (10 foot lengths of clear pine in my particular case) through them without binding, but snug enough that it won't wobble around.
Note, I should have had a 4th clamp in the upper left corner, but because of the table top on my saw, I couldn't put one there. My front clamp was tight enough.

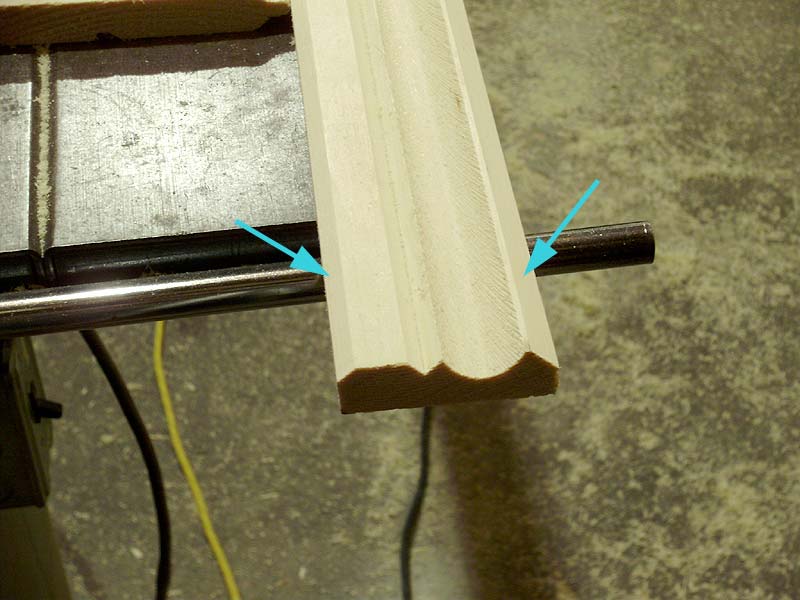
Step 2:
Back your blade down and make your first cut. Repeat your cuts until you have the correct depth for your profile. On your last pass, try to move your stock slowly and evenly, and if possible, avoid stopping (try to pass the entire piece in one continuous motion if you can do this safely). If you stop and start a lot, each place you stop could potentially leave a deeper groove or a burn mark in the wood.
Step 3:
The rest of the steps will be different depending on what moulding profile you're copying, but for the rest of this tutorial I'll just be referencing to this particular classic Roman Ogee profile.
For this step, I need a V groove in between what would otherwise be a simple "ogee" (an S curve). On my sample, I had cut this groove with 2 saw cuts, but a much better option is a V groove router bit, using a fence on my router*. You can also do this on a router table, and if all you have is a table saw, that will work just fine, but there's more set-up involved in getting your cuts just right (and more saw marks to sand off later).
When using a router with a fence, you must make sure that you are running the router in the correct direction. In my case, if I am holding the router in front of me in both hands (in the ready-to-route position), I have my fence on the left side of the cutter. This means that I want to have the router fence on the left side of my board, and I want to be pulling the router towards me (left to right down the length of the board, walking backwards). If I were to start at the other end (same exact setup, routing on the left side of the board), but cutting right to left (pushing the router away from me, walking forwards) then the blade rotation will want to push the router away from the centre of the board towards the edge (and totally screw-up your cut). When routing in the proper direction, the bit wants to pull towards the centre of the board, and keeps the fence snug along the edge of the board. Trust me on this, and don't argue. I've ruined my fair share of beautiful fluted columns (usually when they're nearly finished) by routing accidentally in the wrong direction.
* Quick side note: The router is one of the few "good" tools that I own, since I knew I'd be getting a lot of use out of it. It's a Makita like the ones we used to have at my old job (they take a licking and are nearly indestructible). I got an amazing deal on it (barely used at a pawn shop for 90$ with all the attachments/case).
Step 4:
Cut the outer mitres (I used a 45 degree chamfer bit with a bearing for these). One side is a deeper cut than the other on this particular profile. The large flat face (right side) might look a bit odd at the moment, but the bevel that will be cut on the back (where the wall will be) will fix this.
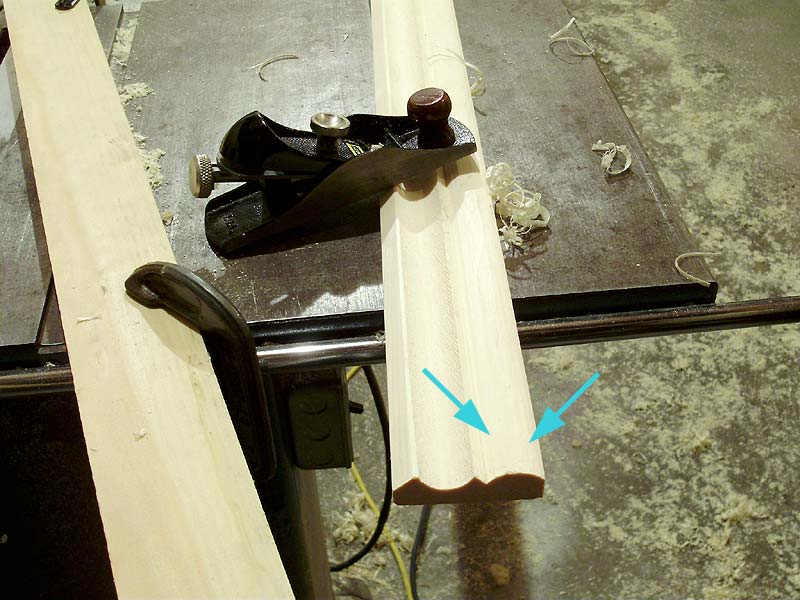
Step 5:
Finish-off the rounded portion of the profile by using a hand plane to shave off the square corners. This might look hard/annoying/time consuming, but it isn't. This part took about 10 minutes (or about the same amount of time as routing the centre V grooves). It won't look 100% perfect, but most of it will be smoothed out in the sanding.

Step 6:
Finish your mouldings by cutting the back mitres (which can vary). These are usually two 45 degree cuts, but not always. On steep crown they can be 60/30 or 40/50, but either way, both angles should add up to 90 for normal applications.
Step 7:
SAND.
One thing that I will mention, though: with cove-cut mouldings on the table saw, there is a LOT of sanding involved. It's not too bad if it's pine or another softwood, but hardwood (especially if you want it to be stain-grade) will need a LOT of sanding. Sometimes you might want to invest 10-20$ on a goose-neck scraper to scrape some of the rougher areas out of the cut before sanding. Alternatively, you can use very rough grit paper (starting with 40 or 60 grit and working up to around 80-100 for pine or 150 for hardwood). For these, I did all the sanding with just 80 grit. If I wanted a nicer finish, I would have continued with a 100, then a 120, which is good enough for pine. I'd go up to 150 for hardwood. I am not a cabinetmaker who advocates sanding things up to 300+ grit. There comes a certain point where you're no longer sanding the wood, and you're just polishing it too much, where it won't absorb stains or finishes evenly. The highest grit I've used on furniture or trim in the past 10+ years was 180 grit. The exception is 320 grit or higher to sand between coats of varnish.
Step 8:
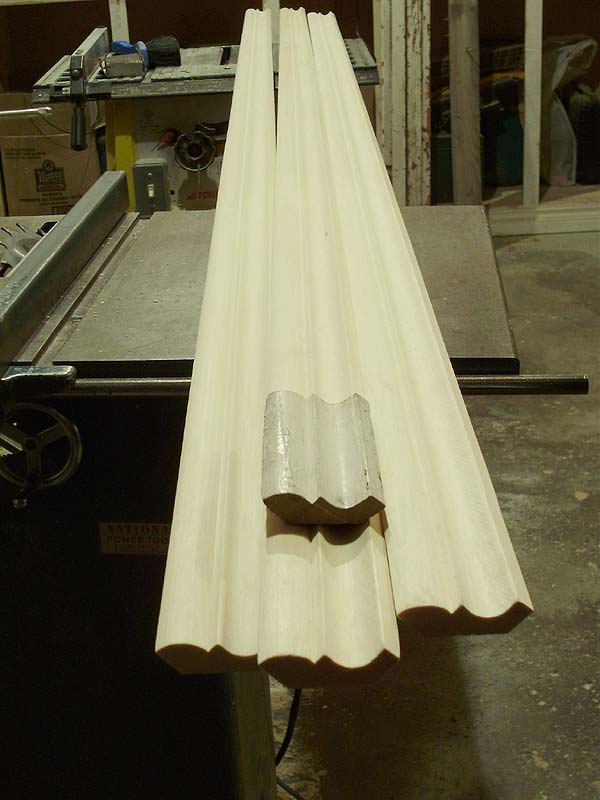
Rejoice in knowing that 30 feet of custom crown moulding in clear pine only cost 37$ to make (as opposed to several 100$ to have them made).
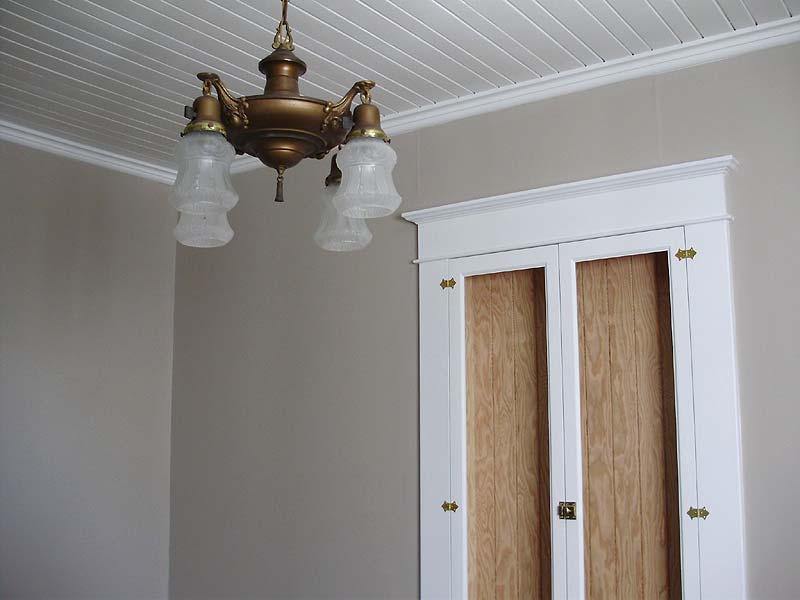
And how do they look?