When the Newely Repaired Roof (or Chimney) Leaks Part 2

Need advice, technical help or opinions, you will find plenty here! (Technical posts here)
User avatar
DRJR
Knows the area
Posts: 76
Joined: Tue Aug 18, 2015 12:44 am
Location: NB CT

Re: When the Newely Repaired Roof (or Chimney) Leaks Part 2

Post by DRJR »

A.Fox wrote:Phil,

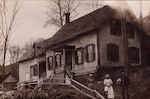
Thanks for the thoughts. The photos are from January of last year and the flashing on this chimney is now stepped and 8" tall. The only photos I have of it now are from the ground.

I'm pretty sure the pots are mortared in place and don't come off easily, which also suggests that there must not be a flue cap, and someone would be able to put a brush down through both openings. Every time I open a damper a few leaves and other debris fall into the firebox. I think my chimney construction is similar, the firebox slopes up toward the front then in brick slopes back before the clay tile flue starts I'm assuming above a smoke shelf, but I haven't reached my hand up there.


Clay pots are always mortared in place. There is no other way to fasten them without damage. Besides you don't want 100+ pounds of clay fasten with screws.
The only way to get large amounts of moisture down a pot is maybe tropical monsoons, or dump a bucket down it. Surprisingly not much rain water will enter the flues. Note it does not hurt to have caps on the pots. It will help keep the critters out. :mrgreen:

If you have leaves and debris falling. There is a good chance there is a critter nest in the flue. Time for a good cleaning.

Now for that leak. Check the flashing around the cricket. Mainly where it meets the chimney, but check where it meets the roof too.
Home formally know as Rotten Ranch

Patched up fireplace, rotten and new siding, with other issues getting the arts and crafts makeover. :mrgreen:

phil
Has many leather bound books
Posts: 4616
Joined: Tue Aug 18, 2015 6:11 pm
Location: Near Vancouver BC

Re: When the Newely Repaired Roof (or Chimney) Leaks Part 2

Post by phil »

one thing that jumped at me is the sides of the chimney. On an ashphalt shingle roof like mine the roofing sits fairly flat and that L shaped counterflashing has to come out on top of the roof, it isnt' tucked under the roofing at least not at the bottom edges of the counterflashing, otherwise it would direct water under the roofing.
With this roof the tile has so much thickness due to the curves. It looks like that counterflashing goes beneath the roofing but maybe its an old pic you did say it was looked into.

if you look at other houses you can often see how well the roofer took care of this counterflashing. many times they dont want to open a can of worms and re-use it. You can tell when they do it nice and neatly as it can often be seen from the street. the cricket is hard to see from the ground. on many roofs this area looks a little messy but I'd rather see the counter flashing poking out on top of the roof than have a leak.

where I left off with my job I got up to one side of the roof and I dont have a cricket. I plan to make one from plywood and install it this year. mine was a bit rusty and iron but it was all grouted in. I put some L shaped pieces that go on top of each shingle and tuck under the existing flashing. It sort of formed two L shapes that work together.
I didnt bother with counterflashing but considered that cosmetic trim that I might do better once I have more time.

I have two different pitches that meet up because they lifted the roof over the kitchen. there is a gap from 0 to about 6 inches and a tapered fascia board. I needed to put counterflashing at the edge of the old roof to prevent the rain from being able to run inside this gap. any water that runs off the edge gets onto the counterflashing and is directed back on top. the bottom edge of the counterflashing lands about an inch below each shingle so it does show if you lok for it but not somethign the average person would really notice. If the roofing met a wall along the gable end, or the chimney it would create a similar situation. I just took it all down and repainted it and reinstalled the flashing that was there. with the red tile it could be painted to match but it creates a bit of a different situation because of the wavy profile of the tile. perhaps the problem is approached in a different way with that sort of roof?

A.Fox
Knows the area
Posts: 60
Joined: Thu Aug 22, 2019 2:53 am
Location: Hammond, IN

Re: When the Newely Repaired Roof (or Chimney) Leaks Part 2

Post by A.Fox »

The roofers are coming back out next Firday to inspect. I'm going to see if I can get them to take an updated picture while they are up there because as you said, I can't see it from the ground, and unlike our other chimey I can't just put a ladder up next to it on the gutter and see what they did since it is surrounded by this and lower tile roofs.

I do think the cricket probably goes all the way to the edge but it is visually burred under the thickness tile.One of the comments on the initial photo report was to cut the tile back further from the chimney so that debris (and then water) doesn't get caught in the valley between a tile and the chimney. I don't think it'd really possible to flash over the side of a clay tile, water will be able to get underneath, but if the flashing extends far enough under the tile, any water that gets under there will continue to travel downhill until the flashing directs it out on top of a tile below the low side of the chimney. The underlayment, which is below the counterflashing is also doing it's part to keep the water out.

A.Fox
Knows the area
Posts: 60
Joined: Thu Aug 22, 2019 2:53 am
Location: Hammond, IN

Re: When the Newely Repaired Roof (or Chimney) Leaks Part 2

Post by A.Fox »

DRJR, I see what you are saying that when actually considering it, not much rain goes down our chimney pots, just like not much rain goes down our open stack vents. Even if we got an inch of rain and it managed to fall straight down, if the chimney pot opening were 6" in diameter, it would be like if someone poured a cereal bowl full of water down the flue.

And assuming the east flue is our living room (I think it is), the water should fall all the way down to the shelf above the firebox on the first floor. It seems like it would take some strange physics for it to be driven through the side of the chimney. If one of those flues was really clogged, maybe that would change this a little?

1918ColonialRevival
Knows where blueprints are hidden
Posts: 907
Joined: Tue Jan 26, 2016 8:58 pm
Location: Baltimore, MD
Contact:

Re: When the Newely Repaired Roof (or Chimney) Leaks Part 2

Post by 1918ColonialRevival »

A.Fox wrote:...It seems like it would take some strange physics for it to be driven through the side of the chimney. If one of those flues was really clogged, maybe that would change this a little?


It would have to be REALLY clogged for water to remain that high up in the flue. As in someone poured a 5 gallon bucket of stones and hydraulic cement down it on top of a large bird's nest.

I'm still thinking it's an issue with the flashing. Either an incomplete solder joint or a dimple in the copper. The pitch of the cricket could be a little off, though I see that as less of a possibility.

User avatar
GinaC
Forgotten more than most know
Posts: 437
Joined: Sat Jan 26, 2019 8:19 pm
Location: Newport, VT

Re: When the Newely Repaired Roof (or Chimney) Leaks Part 2

Post by GinaC »

I have not nearly as much experience as everyone else here, but my vote also goes for the problem being the flashing as well.
1939 Minimal Traditional

User avatar
DRJR
Knows the area
Posts: 76
Joined: Tue Aug 18, 2015 12:44 am
Location: NB CT

Re: When the Newely Repaired Roof (or Chimney) Leaks Part 2

Post by DRJR »

A.Fox wrote:DRJR, I see what you are saying that when actually considering it, not much rain goes down our chimney pots, just like not much rain goes down our open stack vents. Even if we got an inch of rain and it managed to fall straight down, if the chimney pot opening were 6" in diameter, it would be like if someone poured a cereal bowl full of water down the flue.

And assuming the east flue is our living room (I think it is), the water should fall all the way down to the shelf above the firebox on the first floor. It seems like it would take some strange physics for it to be driven through the side of the chimney. If one of those flues was really clogged, maybe that would change this a little?


Your leak is a sign of failed flashing. If you had a large amount of water going down the flues. You will have water seeping out of the clean outs. Plus it would be dripping into the fireplace.
Home formally know as Rotten Ranch

Patched up fireplace, rotten and new siding, with other issues getting the arts and crafts makeover. :mrgreen:

User avatar
Mick_VT
Moderator
Moderator
Posts: 2437
Joined: Sat Aug 15, 2015 2:39 am
Location: Central Vermont
Contact:

Re: When the Newely Repaired Roof (or Chimney) Leaks Part 2

Post by Mick_VT »

A.Fox wrote:
And assuming the east flue is our living room (I think it is), the water should fall all the way down to the shelf above the firebox on the first floor. It seems like it would take some strange physics for it to be driven through the side of the chimney. If one of those flues was really clogged, maybe that would change this a little?


Not quite as most chimneys, even if sealed at the bottom will have a little updraught. Some will get down, but it will coat the inside of the flue... it takes a huge storm to have much liquid accumulate at the bottom. Having said all this is it better to cap off unused chimneys to stop heat loss and critters
Mick...

phil
Has many leather bound books
Posts: 4616
Joined: Tue Aug 18, 2015 6:11 pm
Location: Near Vancouver BC

Re: When the Newely Repaired Roof (or Chimney) Leaks Part 2

Post by phil »

I think he might be right. it looks like the cricket is directing water under the roofing instead of on top of it so it can run away. maybe a bit larger one could cover what's there. If you tore into it you could probably apply a stick on rubberized membrane. you might use whats there for where it is inserted into the grout line or if you want you can cut that grout out whith an angle grinder, then grout in the new one. Another way to attach it to the chimney is to roll up lead into pieces that you can hammer into the cutout. Its not too visible so I'd just use a different type of roofing for that little section. Id be tempted to make a plywood form that fits right over top of whats there, leave well enough alone beneath, once you stop the water it shouldn't interfere with anything too much. I think I'd be tempted to use the next grout line up from the one they used to get the whole thing a little higher and then make the edges of it spill on top of the roofing and away from the chimney hole.

you could make a cardboard pattern while on the roof then build most of it on the ground.

if you want to bend a large piece of tin/ copper or aluminum, you can clamp it between a couple of 2x4 then lay a third one along where you want to bend and hit that one with a hammer to force it to bend neatly. poor man's metal brake.

A.Fox
Knows the area
Posts: 60
Joined: Thu Aug 22, 2019 2:53 am
Location: Hammond, IN

Re: When the Newely Repaired Roof (or Chimney) Leaks Part 2

Post by A.Fox »

Quick update:

The roofers finally made it out last week after multiple cancellations for snow. They measured the plaster moisture, looked in the attic, looked in the roof, and climbed to the top of the chimney.

Inside the moisture readings were higher on the left side of the fireplace over by the wallpaper wrinkle, but it was dry on the other side. The ceiling also measured as dry even though a strange semi circular wrinkle has appeared there over the last month. No discoloration here, just a wrinkle. This however could be something to do with the plaster repairs and the liner paper on our ceiling and not at all water related.

In the attic there were not any signs of water, just one random higher moisture reading on the underside of the sheathing about 5’ up the roof.

Outside they did not see any defects with the roof or the new copper cricket or flashing, though they did replace one cracked tile and another that they broke while on the roof.

Up at the top of the chimney I was surprised to see that the cap is actually 5 or more pieces. Even though the masons replaced the sealants between each of them, that’s still a lot of joints that could fail. They also inspected the top of the flue on the side of the leak. The chimney pot for that flue was oddly offset from the round terra-cotta flue units with mortar used to fill the gap. The top flue unit was similarly offset from the one below it, with more mortar filling the difference. It’s as if the flues weren’t spaced right during construction and had to be fixed at the top of the chimney.

The roofers suggested work for the chimney to at least rule it out as a variable. They recommended coating the cap with a waterproof seal and investigating a cap for the chimney pots (they were going to research that as well). Meanwhile we are gong to ge5 back on looking for a chimney sweep to clean and inspect all three flues.

Post Reply