
Identifying 1930s Wood Floor
-
morganjones
- Just Arrived
- Posts: 1
- Joined: Thu Aug 29, 2019 1:52 am
Identifying 1930s Wood Floor
Hello all! I am brand new to the forum and thankful to have found it in my research. I just bought my first home in May and it is a small “bungalow” of I believe craftsman style. We are located in northeast Missouri. I have bad allergies so we were always planning on ripping up the carpet, but we were so pleasantly surprised to find the original wood floors underneath. We will go room by room removing the carpet and prepping for eventually sanding. We’ve already discovered a large patch job and am wanting to start sourcing reclaimed wood to fill it but I’m a total newb and am hoping for guidance on the type of wood. I have had friends tell me pine, heart pine, vertical grain fir, etc. but I’d like to hear this forums thoughts as I can tell there are some very experienced restorers here! I’ve attached pictures of the room we have already removed carpet in. I’m also curious...do I need to worry about identifying water stains or pet stains or will sanding take care of those? Thank you all in advance!
- Attachments
-
- F67CE39E-D1CF-40B8-8658-AD4D8E362C9C.jpeg (996.41 KiB) Viewed 10106 times
-
- 4CFF5565-708B-469B-8B4F-7F3A82E0E588.jpeg (901.94 KiB) Viewed 10106 times
-
- F503C6D1-B734-47A5-B298-FA407A23E282.jpeg (990.37 KiB) Viewed 10106 times
-
- 25FA95C8-09DA-4484-BA4E-974335C90B3C.jpeg (965.01 KiB) Viewed 10106 times
-
- F1ECA089-888C-4642-AD2F-BA591D6EE2DE.jpeg (1.42 MiB) Viewed 10106 times
-
- AB00116E-FC0C-42C4-A0DA-EBF9F5A5DB3F.jpeg (952.74 KiB) Viewed 10106 times
-
- E048CB93-AF07-45E3-8437-B4C2B560E7B2.jpeg (1.6 MiB) Viewed 10106 times
-
- EA20F555-1185-4587-BA87-317F3730EB8B.jpeg (1.32 MiB) Viewed 10106 times
-
Gothichome

- Moderator

- Posts: 4184
- Joined: Sun Aug 16, 2015 8:34 pm
- Location: Chatham Ont
Re: Identifying 1930s Wood Floor
Morgan, first off welcome to the District. Your best source for reclaimed is a closet or some other area that is hidden. The floor there will be of the same age and will match seamlessly, Other than the shellac being in better shape. Other than the plywood patch your floors look to be in good shape might might not need a heavy sand, you might get away with being reshellaced. You may be aware that your floor was intended to always have a carpet in the middle of the floor and only the outer sides were finished.
I can not see the relationship to the rest of the floor but your first pictures looks to have some black goop, if so it may indicate there once was a linoleum floor, or (even better) a linoleum carpet.
I can not see the relationship to the rest of the floor but your first pictures looks to have some black goop, if so it may indicate there once was a linoleum floor, or (even better) a linoleum carpet.
-
phil
- Has many leather bound books
- Posts: 4616
- Joined: Tue Aug 18, 2015 6:11 pm
- Location: Near Vancouver BC
Re: Identifying 1930s Wood Floor
I can't say for certain but my guess is it's oak. bear in mind that's just my guess.
Fir is probably the most common flooring but it is usually cut with vertical grain , Yours has a lot of flat grain. Oak is much harder than fir. the edge grin is tougher and more dimensionally stable. Because fir is not a very hard wood it fares better if it is vertical grin so it usually is cut that way for flooring. . oak is so hard you can get away using the flat grain and it has some nice patterns if it is quarter sawn. that said there are thousands of tree species. once trains crossed the US the likely sources covered a greater area. In earlier times the wood was more likely to be local and other homes in your area that were built near the same time period may help prove it. If you talk to a local sanding company they will probably know best. be careful because they can wreck your floors if they dont care or know how to do it properly. if you want o DIY we can guide you through the process with ideas and tips from our own experiences. some have been successful at refinishing without sanding. part may depend if you want it to look like an old pub floor or a newly finished floor. both can be attractive. to sand properly you can remove baseboards and rent a drum sander, then an edger, do your filling of cracks and nail holes etc then rent a pad sander for the final finish sanding. there are other ways bu tthat's how I did all mine. removing the baseboards is optional it can be done without but I prefer to remove them I also paint strip and restore the baseboards and its easier to work them with them off. some baseboards are super fancy and you can decide how far you'd like to go.
for finish you can use oil like linseed oil or tung oil or danish oil. i would add some turpentine to the oil. you can use shellac and that's probably original or you can use poly. poly is tougher but its more work. i wouldnt use water based poly but if you hire out the floor finishers will want to use that because of the VOC's the oil based poly tends to give a mre yellow appearance and allows the wood to naturally darken. if you sand your floors they will be lighter and they will darken up over a few years.
I use several coats of danish oil then at least 3 coats of poly poly but what you do may depend on things like how original you want it. Do you want it to be perfectly smooth so you can skate across it in your socks or do you desire a rougher finish? If you make it like glass you'll see any future damage more than if you go with a rougher look. also some homes are museums and so the historic importance of the building might influence your decision. both poly and shellac can be cleaned scuff sanded and recoated. oil is the easist but requires periodic applications to maintain. its hard to go wrong with a coat of oil the poly or shellac have some technique which yoiu can learn. with poly you choose the finish so you cna have satin or gloss of flat sheen. if you use it use gloss until you get to the finish coat.
both woods will display black marks near nails and maybe from pet stains. you might be able to remove the stains with "wood bleach" or oxalic acid. be aware that applying a spot may lighten the floor in that area so be careful if you iuse it you may need to blend it or treat the entire floor for uniformity. dont; use houshold bleach that is a totally different chemical.
If you plan to sand. assess the thickness first. stick a credit card in the gaps where you can use that as a depth gauge. check random places but especially high traffic areas where they could have sanded more. near where the couch or the entrance would be and main traffic areas. look near the baseboards and see if you can see signs of previous sanding. you might remove a baseboard and see how it is the original thickness where the baseboard is then it dips down to the sanded thickness. look for a slope or hump there.
with tongue and groove you will break through and open up the groove if you sand 1/3 of the thickness or 3/8 of an inch assuming it is 3/4 thick. at that pint you have no wood above the tongue
You cant really approach that too closely because if you do the wood will be thin where the tongue and groove fit together so you really dont want to remove more than you need or it can crack in this area. maybe 1-2mm or so, not more than 1/8th inch total. a dime is 1mm thick.
as you sand deeper you expose nails. they can be driven down and puttied but there are limits. If you choose to sand you might need to take a fair lick off to get down to uniform wood or the sander might make it patchy because naturally some boards are higher than others. some have attempted to sand lightly with various results but i found I needed to hog a fair amount off to get uniformity. your mileage may vary.
you can replace boards or sections mid way through the floor and we can discuss techniques if you like.
you can choose to putty every crack and nail hole if you want it perfectly smooth. I like that way and I leave any crack I cant' fit a credit card into . If you are subject to humidity swings leave more. the floor does need to grow and shrink as humidity changes. boards change dimension across their grain. the length wont change an appreciable amount, but some. If you make the floor tight then wet it it can cause the wood to hump up if it has no room to move. If you have a wet basement of if it gets super humid where you are take that into consideration.
if you want more perfect than just sanding you can hand scrape the floor. It adds time but makes it even more flat and smooth. You may or may not want that. I like doing it myself but its a bit over the top if you are hiring out.
if you have black tar like stuff try water, alcohol ( mineral spirits) paint stripper, lacquer or acetone as a test what dissolves it might offer clues. so I'd try a little spot and see what dissolves the stuff or what has no effect. if you sand it might eat right though but if it is really thick then it will plug up the paper. the paper is part of the expense not only the rental of the machines. if you rent machines they will remove any paint , some stains may go deeper than you want ot sand so you sometimes have a decision to sand more or leave it. from a preservationist viewpoint less sanding is best. a goo tough finish increased the duration between sandings there is no right way or free ride all the chemicals and finished have advantages and disadvantages. the more you learn before you start the more likely you are to make the decision you favor most. It's your house and your decision. I suggest gathering opinions then make your own decision later after considering the pros and cons of each method and finish .
If you want a quick fix like for a rental use cheap laminate and you can work on the floor when you have time and can afford to make the dust and absorb the expense. Its a fair amount of work. lots of kneeling. I think it cost me about 1000 per room for all the rentals sandpaper floor finishes, putty etc. I didn't want to hire out because I have trust issues and like to do my own things if I am able. I didn't wan to risk a bad contractor but there are great ones. make sure you get references,maybe ask to see their last job and speak to the customer. last thing you want is some crazy kids learning how to use a drum sander on your beautiful old floor.
your baseboards appear too small to be original , likely they were about 8 inches tll and removed previously. same with the door casings. as part of your plan you may decide if you are OK with that or if you wish to restore the look it might be nice to replace them , maybe by salvaging others. mine were never installed in my attic so I bought some new fir planks. it added some expense but was faster than finding and restoring the originals. You have some siding added too and every house need to be put back to original but it might have clapboard or cedar shingles or something under the siding. it looks lie all the doors and windows wee lost o contractors too in an effort to clean it up. some may choose to try to replace what is original and others may say why? it looks fine. how far you go depends on cost and how much you value the antique house look. Its easy to get off on a tangent and try to revert everything to the way it could be originally but often it is a labor of love and not a great financial decision. Some work very hard to make old houses look original and it is often a passion rather than a practical decision. it looks like you have a nice clean and very livable little house.
-
PaulJohnson
- Knows the back streets
- Posts: 94
- Joined: Wed Apr 03, 2019 3:02 am
- Location: Massachusetts
Re: Identifying 1930s Wood Floor
To my eye it looks like fir or old growth oak.
The advice you received above is sound.
Below are just my opinions.
Before you try to sand and remove anything it is best to try and figure out what is on the floor.
In an inconspicuous spot that is just finish (no remnants of adhesive) apply a small dab of denatured alcohol. If the finish softens, it is shellac. If only dirt is removed it is most likely varnish or polyurethane.
To remove the existing finish renting a floor sander is an option. You will most likely want to buy 40 or 60 grit paper. It is aggressive and not easy to work in corners and along baseboards without hitting the edges. Another option that is time consuming, but provides more control is a random orbital sander with 40 or 60 grit paper. You will spend more time and also have more control.
That is how i did the floor in my dining room which was varnished.
For a finish you will want to decide if you want a light color or darker.
If light - after sanding you can wipe it down with a 1:4 mix of bleach and water. It will raise the grain a bit which will require a light sanding (100 grit) to smooth it out. Then apply 2-3 coats of polyurethane.
For a darker finish you can equally mix boiled linseed oil (BLO, paint thinner, and polyurethane). This will give you a darker color with some finish protection I would recommend top coating the floor with at least one more coat of polyurethane for a truly durable finish.
We have given you a few options and are always here to help. Please let us know what you decide.
PJ
The advice you received above is sound.
Below are just my opinions.
Before you try to sand and remove anything it is best to try and figure out what is on the floor.
In an inconspicuous spot that is just finish (no remnants of adhesive) apply a small dab of denatured alcohol. If the finish softens, it is shellac. If only dirt is removed it is most likely varnish or polyurethane.
To remove the existing finish renting a floor sander is an option. You will most likely want to buy 40 or 60 grit paper. It is aggressive and not easy to work in corners and along baseboards without hitting the edges. Another option that is time consuming, but provides more control is a random orbital sander with 40 or 60 grit paper. You will spend more time and also have more control.
That is how i did the floor in my dining room which was varnished.
- 6C1364F1-76F2-4444-81F5-0843283AAA27.jpeg (700.45 KiB) Viewed 10085 times
- 9F23181B-9514-4007-8796-8368EA655310.jpeg (713.57 KiB) Viewed 10085 times
For a finish you will want to decide if you want a light color or darker.
If light - after sanding you can wipe it down with a 1:4 mix of bleach and water. It will raise the grain a bit which will require a light sanding (100 grit) to smooth it out. Then apply 2-3 coats of polyurethane.
For a darker finish you can equally mix boiled linseed oil (BLO, paint thinner, and polyurethane). This will give you a darker color with some finish protection I would recommend top coating the floor with at least one more coat of polyurethane for a truly durable finish.
We have given you a few options and are always here to help. Please let us know what you decide.
PJ
Re: Identifying 1930s Wood Floor
Poly is not the best option for floors IMO, look into Waterlox, or Rubio Monocoat (or other oil finishes)
Mick...
-
GinaC
- Forgotten more than most know
- Posts: 437
- Joined: Sat Jan 26, 2019 8:19 pm
- Location: Newport, VT
Re: Identifying 1930s Wood Floor
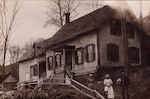
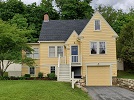
Thanks for all the replies. My upstairs floors are similar, and everyone I've asked about the wood trim/floors in my house says it's old growth pine. The floors in the upstairs bedrooms are in very bad shape, bad enough that my first thought was to just paint/stencil them and get it over with.
I might as well try to refinish them first, though. Old House Journal had an ad for this thing, so I bought one. My rooms are very small, and this might work for me. At the very least, I'll be using it on the back deck and siding. https://diamabrush.com/product/wood-dec ... ding-tool/
I might as well try to refinish them first, though. Old House Journal had an ad for this thing, so I bought one. My rooms are very small, and this might work for me. At the very least, I'll be using it on the back deck and siding. https://diamabrush.com/product/wood-dec ... ding-tool/
1939 Minimal Traditional
-
phil
- Has many leather bound books
- Posts: 4616
- Joined: Tue Aug 18, 2015 6:11 pm
- Location: Near Vancouver BC
Re: Identifying 1930s Wood Floor
Ive done several floors. each time I remove baseboards, rent a drum sander. You'll need fairly coarse paper at first , like about 36 grit. then you work through the grits to about 100 or so. I recommend practicing with a finer grit but you wont' be able to remove all the damage without a fairly serious grit. you also dont want to use a more coarse paper than needed to bite through everything including the damaged areas. so start with 100 then try 60 , youll probably realize it won't remove enough until you get down to about 36 but if 60 works , then stop there, the object is to get it to look nice without removing more than is necessary. once you finish with the coarsest grit then work through each grit to at least 60 or maybe 100.
the drum sander passes are often done at a 45 degree angle this is to flatten the floor. If you only go with the grain the weight of the machine makes the floor flex it weighs over 100 pounds. you can see the effect of the floor flexing and end up with patterns where the joist are. he shine will look like ripples across the floor with dips between each joist , despite the subfloor being on top of the joist.
with rough sanding done you wont' be able to get right up to the walls so the second sander is the edger. It uses rotary disks and you work around the edges or any spots the drum sander wouldn't fit into. again you go through each grit don't miss stages. Then I do any putty work nail holes bad gaps etc.
finally I rent the big pad sander. it has a square pad and you use a piece of 1 inch thick 3 M pad behind the paper. that one floats around and you can move it any direction. It has a big pad surface and again weighs over 100 lbs. the reason for the big pad and the weight of the machine is to level the floor out. this hides the work that you have dome previously and blends the work done with the edger in. the idea is to hide the sanding marks and sand everything perfectly flat. if you dont go through the grits with each machine you'll see the marks it left.
If you go using little sanders, some have used random orbital sanders and such. it will follow the dips and valleys, It wont flatten the floor out. You'll spend forever and you will never get it flat that way.
I wouldn't suggest doing this because I feel if you want to sand the floor do it right and be left with a professional job. Its too important to mess up. Some are happy doing that and yes you can smooth it out and recoat. If you want it smooth and flat then use the commercial machines. You can rent them quite reasonably but I'd try watching some U tube videos and such or get someone with a bit of experience to lead you in the right direction or you might choose to have someone in to do the job for you.
I figure the cost is roughly $1000 for all including sandpaper , the machine rental, your floor coating products of choice, putty, etc. that's expensive but its not something you do often and it will really make a room if you do a good finishing job. its lots of work and lots of working on your knees. id just use a different type of flooring or do it right myself because it will really affect the value of your house. I'd be careful because it's not something you want done in some cheap way. mixing the putty so it really does match with the wood is a very important step and as I went I got better at it. you might find a commercial guy that can do it for about that price as he isn't renting the machines and he's also getting a better deal on the sandpaper which adds up on a floor project. if you rent machienes you wan to use them and get them back or it just adds expense, for a flooring guy he can have them all on-hand throughout the job.
some planks are softer , some are harder some will be higher than others. in order to obtain a good even finish you want it perfectly level. I follow the sanders with a hand scraper to finish it off and this helps flatten and remove any marks that got missed. sometimes you have low spots from damage and might not want to remove enough wood to get rid of every spot so it's a trade off and you can work some of those spots by hand. before the final stage of applying coating I only walk on it in socks or shoes that I only wear in the room because even a shoe print can come through the finish. you also want it perfectly clean , no bits of cat hair or sand from the paper, no dirt. you dont want that stuff embedded the finish.
I couldn't count or justify the hours I spent especially with the putty work but I feel it really makes the difference to do the best job you can. a good quick fix is laminate if it's too costly or if you really dont want to spend the time or money on it. that way it wont damage what's existing and you still have the option to restore the floor another day when it makes sense to you.
in my experience you have to take a good lick of material off to get things even so this is not something you can do a bunch of times to a floor. I do several coats of danish oil and at least 3 coats of poly to create a hard durable finish because it's not something I ever want to tackle again and because I'd run out of wood thickness if I tried. Its surprising how deep some of the damage goes, at least that's been my experience. to give a visual example you'll fill at least one big garbage can with sanding dust. Its not a job for the little thing you pictured. that thing might have some use but if you used it on a floor you'd just make little circle marks all over the floor and it would look like crap.
when sanding wood , it is normally important to go with the grain, the only exception is where you are levelling it and then you are going to finish up with the grain and with successively finer grits of paper, each successive grit hides the imperfections of the previous but leaves it's own patterns. the pattern of a tool like that is circles, Its just not suitable for your floors.
if you prefer or want to try there is nothing wrong with washing off your old shellac finish , it will come off easy with lacquer thinner. you can try a new finish without any sanding. If you are not to fussy maybe that would make it look better without resorting to sanding some of this depends upon what sort of finish you'd like to end up with. if the floor only has damage to the finish and not the wood you wouldn't want o remove the wood unnecessarily of course but in my experience this has never been the case. the wood gets dented, boards normalize and after time it really is not flat, when you sand the paper first hits the higher parts, the last is those gouges where someone shifted a couch without lifting it. on my last floor I had some bad ones and I had to opt to leave some of that old damage to show or I would have simply run out of wood. Its a delicate balance where to draw the line and stop before you go too deep and end up sorry you did.
Phil
-
GinaC
- Forgotten more than most know
- Posts: 437
- Joined: Sat Jan 26, 2019 8:19 pm
- Location: Newport, VT
Re: Identifying 1930s Wood Floor
Thanks, Phil, I did that job that way in my 1933 apartment in Brooklyn in the '90's, so I know exactly what you're talking about. They were gorgeous inlaid parquet and turned out lovely.
I can't do that in this house, for two reasons: 1) there is no way I'm getting that heavy equipment up the stairs and into my tiny rooms around the tight corners, and 2) I have to do it piecemeal because I have no place to put my furniture.
If it turns out horribly, and honestly I'm not even sure it can be recovered at all since it is so banged up, I'll just paint it, as was my original plan.
1939 Minimal Traditional
-
phil
- Has many leather bound books
- Posts: 4616
- Joined: Tue Aug 18, 2015 6:11 pm
- Location: Near Vancouver BC
Re: Identifying 1930s Wood Floor
its definitely an undertaking. the machines are heavy but not so big they wont go through doorways and stuff. If you paint it then want to sand later how would you get the paint out of the cracks? or would that be it for your floor? maybe you could put thin plywood down and paint that to prevent getting paint in all the cracks? I'd definitely want to save them myself, no way I'd want to paint them in. A sander can eat the paint off, but there is no tool to get down in the cracks without spending a lot of time. I had one that had some mastic and I had to take a little pick and go through every crack to get the white bits out , then putty.
but I totally understand how it is a lot to live around. I was able to crowd other rooms and empty the area I needed to work on. In my living room I temporarily installed a door and that helped a great deal to separate the work area.
what I did to make it a little easier was to get those rubber mats that click together, and they were very good because I could move them around as it suited me and I still had access to any area of the floor I wanted to work on.
I think you should just lay laminate, you can pit a thin layer of foam and then the floor, its called a floating floor and it doesn't need to be glued to your floor. they aren't too expensive and at least it isn't so damaging as painting it. Some of the patterns do look nice. if you ever do sell the house the new owners might want to restore the floor then its easy to pull up and you could probably handle laying that yourself with some furniture in the room.
if you did sand I'd do it in spring and summer because you want to open the windows if you are using all the chemicals.
if you absolutely felt the need to paint it I'd at least give it a few coats of shellac and try to get that into the cracks rather than paint. it would make stripping the paint back off the floor so much easier. if paint has shellac under it you can heat gun it off a lot easier and that wouldn't change the painted appearance much, if anything it might help fill some of the voids.