
Hello All.
I was recommended to this forum for help identifying my floors.
am currently repairing a 1924 Dutch Colonial in Connecticut, and unfortunately my second floor has damaged flooring in the center where I repaired a beam.
I thought I could just use floors I scabbed from under the old bathroom tile, but I only have about 80 sq ft of good flooring. The second issue is that the floors have been sanded VERY heavily because the previous owner tried to fix some waves in the floors which happened after the beam cracked and dragged the center of the house down 3". My flooring guy said if we sand it, when we buff them it will probably splinter, and nails will certainly be exposed. We aren't sure yet what the extent of the nail popping and splintering will be, because the heavy sanding MAY be centered around the beam in the middle of the house.
Anyway, to make a long story as short as possible, I have two questions.
1. We cant agree on my flooring type. I think it is quarter sawn heart pine, but my flooring guy thinks it is quarter sawn douglass fir (also referred to as clear vertical grain I believe). I am attaching some photos below of my floors, and of the samples I ordered. I am interested to see what you all think.
2. Regardless of the flooring type, it is very expensive to replace 500 sq ft of it. It would be a shame to only replace half of it, because it would have to be sanded down to match the old floors which are significantly sanded as I mentioned. Any ideas on compromise? I would love to find some used floors rather than buy $11 per sq/ft floors that were cut from old factory beams. Some lightly worn ones would be perfect. Any ideas on where to look for them?
If you look at the photos below, the picture that has the 4 floor samples has a sample of my old board. The one second from the left (Old board is written on it). The board to the left of it is a piece of CVG douglass fir floor, and the two on the right are heart pine reclaimed boards.
To me, it looks like my board that I scabbed up and sanded looks more like heart pine.
1924 Dutch Colonial Floors - Heart Pine or Doug Fir?
1924 Dutch Colonial Floors - Heart Pine or Doug Fir?
- Attachments
-
- IMG_0105.JPG (780.75 KiB) Viewed 4384 times
-
- IMG_0104.JPG (1.23 MiB) Viewed 4384 times
-
- IMG_0103.JPG (1.21 MiB) Viewed 4384 times
-
- IMG_0102.JPG (1.21 MiB) Viewed 4384 times
-
- IMG_0101.JPG (1.27 MiB) Viewed 4384 times
-
- IMG_0100.JPG (1.28 MiB) Viewed 4384 times
-
- IMG_0010.JPG (881.19 KiB) Viewed 4384 times
-
- Floor I.jpg (1.18 MiB) Viewed 4384 times
-
Gothichome

- Moderator

- Posts: 4188
- Joined: Sun Aug 16, 2015 8:34 pm
- Location: Chatham Ont
Re: 1924 Dutch Colonial Floors - Heart Pine or Doug Fir?
Nunnink, your floors as a whole looks like heart pine. Now whether it's old growth hart pine I would not be able to tell the difference. It's my under standing that by the time your home was built most of the old growth longleaf pine stand were long gone. Saying that there is no reason I can see why a the stands of smaller long leaf pine could not be used. We have some realy sharp folks here on these sort of things, hopefully they will offer an opinion. But going with the pics I think you pretty well have to go with the reclaimed lumber.
-
Gothichome
- Moderator
- Posts: 4188
- Joined: Sun Aug 16, 2015 8:34 pm
- Location: Chatham Ont
Re: 1924 Dutch Colonial Floors - Heart Pine or Doug Fir?
Oh, while your here, post a few pics and introduce yourselves. We have several folks In the district with fine Dutch Colonials.
-
1918ColonialRevival
- Knows where blueprints are hidden
- Posts: 907
- Joined: Tue Jan 26, 2016 8:58 pm
- Location: Baltimore, MD
- Contact:
Re: 1924 Dutch Colonial Floors - Heart Pine or Doug Fir?
Definitely looks like heart pine. This was a common choice for flooring in the early 20th Century. Oftentimes, oak would be used in the "public" areas of the house and heart pine would be used in areas like the bedrooms.
Check architectural salvage companies. Virtually all of them will have some kind of reclaimed flooring, though it seems around here that oak turns up most often. Pine is a softer wood and cuts a lot faster under a sander and as a result, many older pine floors have been sanded down into the tongue.
Check architectural salvage companies. Virtually all of them will have some kind of reclaimed flooring, though it seems around here that oak turns up most often. Pine is a softer wood and cuts a lot faster under a sander and as a result, many older pine floors have been sanded down into the tongue.
Re: 1924 Dutch Colonial Floors - Heart Pine or Doug Fir?
Thanks guys! I will post a separate topic with some pictures of the house!
I have these floors throughout my house, and oak on the stairs. The issue is that the upstairs probably is at the end of its life as I mentioned.
I think my plan is to try sanding them this weekend with a light random orbital sander until all the old finish is gone, and then see what the condition is. I think I will get a fair amount of splintering and nail popping, but I could get lucky.
So far I have two quotes for floors.
1. The piece directly to the right of my original floor board (third from the left or bottom depending on picture orientation) - $18.50 per sq/ft.
2. The piece far to the right or top depending on picture orientation - $11.50 per sq/ft.
Both companies can mill me boards in my exact dimension (2 1/2" X 3/4"). I would need around 525 sq ft, so this will add up VERY quickly, especially at the end of a very expensive renovation. And I haven't touched the outside yet
Do these quotes sound in line with salvage yards? The floors would be freshly milled out of reclaimed timbers.
-
phil
- Has many leather bound books
- Posts: 4616
- Joined: Tue Aug 18, 2015 6:11 pm
- Location: Near Vancouver BC
Re: 1924 Dutch Colonial Floors - Heart Pine or Doug Fir?
I would have said fir. i dont' see much pine out here os I dont' really have that comparison but it looks like VG fir to me.
If you are looking at buying new flooring , check what lengths they come in. It was common in older homes to have 20 foot and longer boards, so there weren't too many places with butt joints. if you go buy new lumber the norm may be much shorter pieces.
from the pictures the floor looks nice. I think you are right in doing a restoration with a minimalist approach to the sanding. If you need to change the odd board here and there even in the middle of the floor it is not that hard so don't' go taking more apart than needed. You can hide the odd nail by driving it down and using putty with a careful color mix. If you do get a few bits where they split I'd just get some epoxy down the crack and fix it using as much of the old piece as possible without getting epoxy on the floor surface. Perhaps you could try your hand at re shellacking the floor if that's what it is? or do a scuff sand and a new coat of poly if it is poly? From what I see in the picture it looks like a nice old floor to me. it looks like maybe some was covered from sunlight so it's not as dark, or you started sanding there? you could do a little color correction to that area to make it blend better.
if you buy used flooring buy some extra you will have some waste especially if it's not in perfect condition. Its normal that some has splits etc so glue any splits as soon as you get it to improve your yield.
maybe it's just my view but when I see the floor you have I'd really be tempted to see if just a coat of wax and maybe some color correction would make it look nice. The problem with sanding is that as soon as you start you will break through the darkened outer layer that has seen lots of sunlight and you will see the difference and this will be a slippery slope as next you will want to make the color even by sanding lots everywhere.
the floor looks flat but when you actually start with sanding you'll find that some corners stick up more than other boards and this will get you into fresh wood that isn't darkend by the UV. it has a brown "skin on it about 1/16th or maybe 1/32". to even it up you need to sand into even the lowest of them. If you could get away with just a scuff sand with the ROS that would be ok but it won't really flatten the floor like a drum sander, it will follow the bumps and valleys. It looks pretty flat to me , not buckled or anything. You might get away with sanding it, but do you need to?
I don't' see any shiners or signs that they have exposed the nails. if they have they have done good putty work. If you have the odd springy spot you can face nail and hide the nails with putty. I have seen other floors where they went too far and exposed the nails but I'd say yours look pretty nice!
Re: 1924 Dutch Colonial Floors - Heart Pine or Doug Fir?
Phil,
I though pine because my sample of VG fir is very light (see the comparison photos). I only found one supplier for VG fir. Does anyone know of others that I can compare to? My floor guy also though fir, but he admitted he never has done heart pine.
Here is the issue. There are two pictures of my floors in that post. The first one that is taken sideways is downstairs, and those floors have only been sanded once. They are in rough shape in some spots from the previous owners dog, but they can be easily refinished.
Upstairs, (the second photo) is not in bad shape in the master bedroom, but the hallway and second/third bedroom needs to be repaired. When I replaced the second floor carrying beam, I had to remove 4 floor boards along the entire length of the house. They were destroyed even before I removed them, and there are a few boards next to them that are damaged too due to settling. There are also some random areas with heavy scratching that needs to be at the very least smoothed out.
No matter what, I need to replace them. I MIGHT have enough wood for that, but it is unlikely, so I will need to buy a little more. I would just hate to spend $11.50 per sq/ft on floors, only to sand them down to their minimum thickness to match the old floors.
The other dilemma is I don't have $5,500 left in the budget at the moment to buy the entire second floor wood!! I was thinking of maybe just doing the hallway and the master, and weaving boards into the other two bedrooms staggered, and then later on picking up where I left off.
I should take some photos tonight of what I am referring to and post them. Then everyone will have a better idea.
-
Al F. Furnituremaker

- Stalwart
- Posts: 309
- Joined: Mon Aug 17, 2015 3:31 pm
- Location: Binghamton, NY
- Contact:
Re: 1924 Dutch Colonial Floors - Heart Pine or Doug Fir?
I'm thinking quarter sawn yellow (heart) pine. There isn't a tree called heart pine. The term comes from the heart wood of the tree (dead part) and usually longleaf pine and some other southern yellow pines are used. Yellow pine is very resinous and hard. Fir is much softer.
Al Fortunato Furnituremaker
http://www.alfortunato.com
https://www.facebook.com/alfortunatomastercraftsman
http://www.alfortunato.com
https://www.facebook.com/alfortunatomastercraftsman
-
phil
- Has many leather bound books
- Posts: 4616
- Joined: Tue Aug 18, 2015 6:11 pm
- Location: Near Vancouver BC
Re: 1924 Dutch Colonial Floors - Heart Pine or Doug Fir?
I hear you guys talking about heart pine a lot but I dont' think it was commonly used here. I was surprised how much it looks like fir, which is also red and yellow with pretty well defined lines. when I compare it to my floor , the grain in my fir is much finer, but that varies from board to board and most of the fir available new has lines spaced similar to what's in the pics. also it is quite similar the way you see the difference between yellow and red and some boards appearing as two distinct colors. I think the red part as Al refers to is the heart pine and the yellow stuff is the sapwood. correct me if I'm wrong. so heart pine would be selected from runs of boards.
the prices you quote seem a bit high but price is a lot about availability.
not all toungue and grrove flooring has the same profile. they may be slightly different widths from one house to the next. If they are too thin you can shim them with tarpaper to try to keep the hight right but if you are "weaving in" the width differences can cause issues sometimes. you can plane them narrower but if your new old boards are too narrow you might have big gaps. If you have to you can cut tapered strips and glue them in then cut them off flush or fill with putty that is color matched well. if you are adding to an edge and can put your new boards together it might cause less issues if there are small dimensional differences as you are basicly re-laying that section of floor.
if you want to remove boards use a router. put down a scrap of plywood that is square to it's own edges. Kneel on it. set it in line with the floor joints to make it square and you can cut most of the way using the plywood you are kneeling on to guide the router. dont' overrun the cut or it will show. complet the last bit with a chisel. then you can take a circular saw and make 2 cuts and pry out the center strip, then the edges will come out easy as you'll then have room to shift them out of the T and G
to replace a board in the middle of the floor. break off the bottom of the groove. lay that under, then put glue on the line where you broke it so you can then lay your new board in place and the glue line will match up and it will fit back together perfectly. get rid of any splinters that might inhibit the piece you broke off from gluing back in place. it needs to fit.
you can slide them in from the end somewhat but not if you have a wall in your way. sometimes I had to observe how it fit and trim a little of the tongue off to get it to slide down into the pocket of the missing one. trim what you need to. you can also face nail where you need to , or you can try to use screws and you can make tapered plugs with a plug cutter but I'd just use filler. The plugs are hard to match up invisibly in that kind of wood than something consistent like mahogany. if you use them you need to make the plugs from similar wood and line up the pattern of the grain.
you can use Pl glue as well. If you know you have a bit of wood missing that you can't see from the surface it's fair game to fill the gap with PL glue just to help support the flooring where you have a bit missing. you mostly don't want the boards to keep rocking or to go springy when you walk on them. the floor sander is pretty heavy so it can push them down temporarily as it's working and cause surface height differences as they spring back up. If you have scraps from your own house I'd favor those to do any center of the room patches, use your reclaimed stuff near the edge where it's easier to fit them if you have dimensional differences. you can assume where furniture will be likely to cover it most of the time.
you can face nail, just drive them down and use filler.
I get the water based filler from mohawk finishing supplies and doctor the color to match, if you mix about 3 colors and try to match the dark and the light accurately you can artfully blend them to hide stuff. i use the powdered pigments to doctor the color. wood isn't' uniform especially that wood so your patches can't be a uniform color unless they are tiny.
if you wan tot fill nail holes try to poke a hole in a piece of masking tape. put that over the nail hole. fill the hole and pull the tape off then on to the next nail hole that way you won't get putty over more surface than where you need it.
you want some cracks for expansion but if they are big enough to slide a dime into then you could fill some with putty or tapered wood strips.
if you go to the pharmacy and ask for the biggest syringes they have you can use those to dispense putty. keep them in a ziploc with a wet paper towel and they wont' dry out. this way you can spend some time doing an accurate color match and keep them throughout the job. the putty will clog even the largest (1mm) needles but if you want you can use the needles for glue on other projects. I had to buy a box of 1000 needles in order to get some. most often a thin blade works as well as a needle for getting glue into tight spots.
I have a very thin artists spatula that is handy for picking junk out of cracks in the floor. some of my floors had white mastic and it was a chore to get every bit out but didn't' wan to bury that in the job. I ground one spatula to a shape that works well as a pick. they are springy steel so they stand up despite being very thin. you can substitute a feeler guage.
if you wan to fill cracks try accurately placing tape on either side then run your putty knife along the tape pressing the putty into the crack. then pull the tape. If the putty mounds up a little from the pressure pushing it back, it usually does, this is good as it will shrink back and you can sand flat later when dry. If you want you can use a card scraper and use the tape either side of the putty to keep the blade the thickness of the tape above the floor. then its fine sanding to level once you pull the tape. don't overdo the putty if you use it and it needs to not match the wood. the putty needs to match the wood when you compare WITH THE FINISH ON BOTH which requires a little messing about to get just right. the filler might not darken quite the same when you topcoat otherwise.
if you want to get finicky you can do a patch with putty, then scribe lines to match the grain, then fill the scribed lines with a darker color of putty. this will imitate the grain enough so you can't notice it. I wouldn't do that too much but sometimes you have a chip that bugs you and you dont' want to replace the whole board to fix it.
You can also do "boats" and plugs and things with wood if you are so inclined. if any patch is very large, like more than the size of a pea you might want to use epoxy fillers. you can get sticks that you cut off and knead to blend the two parts. epoxy may not darken like the wood fillers so be careful with that. its tougher than regular putty. if you want you can use oil based putty. it dries fast its harder to work with.
I had a spill in my kitchen in an area where i had done some crack filling. the wood expanded and it started to expel the putty. then it shrunk back when dried. I realized that if I had used a tougher putty then it might have caused the floor to heave up. I can repair the putty. so I thought it's good to use the water based stuff if you fill lots of cracks. remember the floor does move. dont' put the flooring right to the wall. Try not to trap it so it can move with expansion and contraction a little. If you can't get a credit card in a crack , leave those ones. if you have huge gaps then if you fill them it looks nicer and crap wont' get stuck in the cracks when you sweep up.
you can also get lacquer sticks in a range of colors and to use those you heat them and use a spatula to press the hot lacquer in. this is more for something like a table with a cigarette burn mark. there is sort of a creme you can get to isolate the areas you dont' want to get hot.
you can get a range of colors of felt pens and you can use them to alter the colors of putty if it doesn't quite match. you can even do slight touch ups between coats of finish sometimes.
You can get the wax crayons in colors, they are good for little nail holes and things not large areas. sometimes you get nail holes from carpet strips and stuff to deal with that are too small for the filler to be necessary. wax crayons are good for those.
as you go , knock down any shiners with a nail set. you don't' want the sandpaper to hit them and you don't' want to stop the machine to contend with them if you rent one.
Last edited by phil on Fri Dec 16, 2016 10:03 pm, edited 1 time in total.
-
CS in Low Hud
- Forgotten more than most know
- Posts: 460
- Joined: Fri Aug 21, 2015 2:23 pm
Re: 1924 Dutch Colonial Floors - Heart Pine or Doug Fir?
Hi Nunnick,
That's definitely quarter sawn yellow pine. In my 1925 Dutch Colonial, we have that flooring in the bedrooms, (and it was also in the kitchen) and then 2" white oak in the living and dining rooms. Here is an original floor in one of the bedrooms: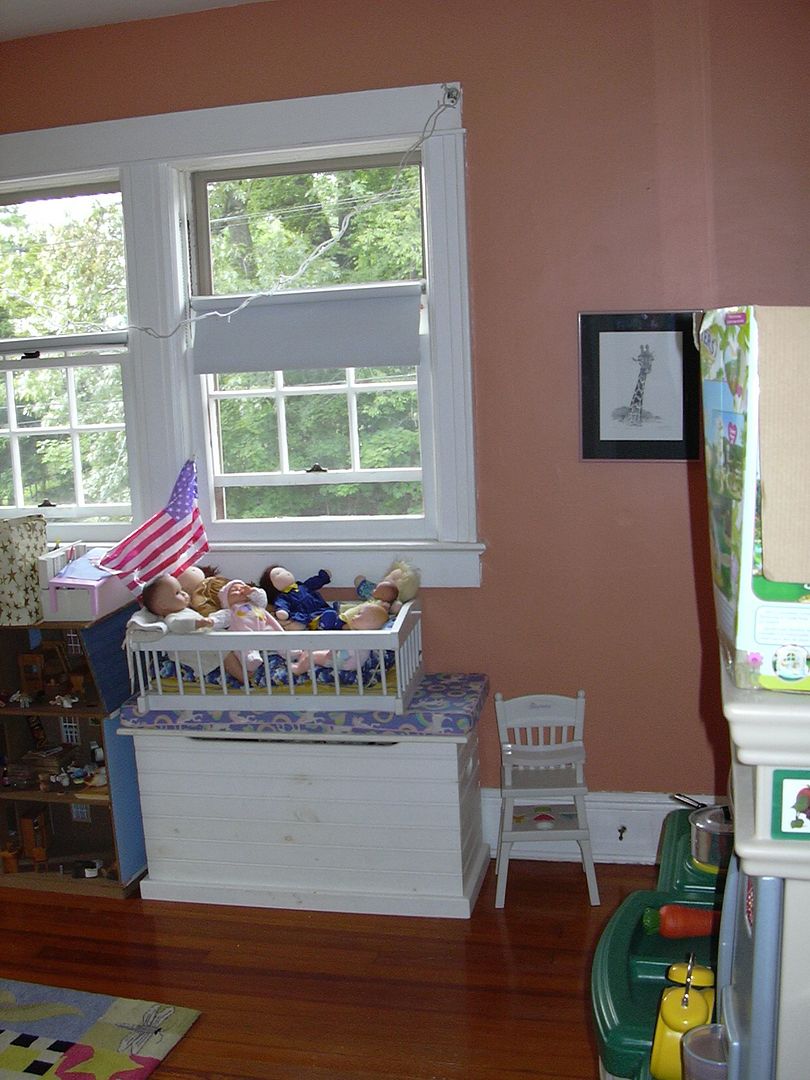
For what it's worth, quarter sawn douglas fir is a reasonable match (I have even used it to patch into the yellow pine). When we added a master bedroom, since I could not get yellow pine, I did doug fir there.
Here's the new bedroom with fir: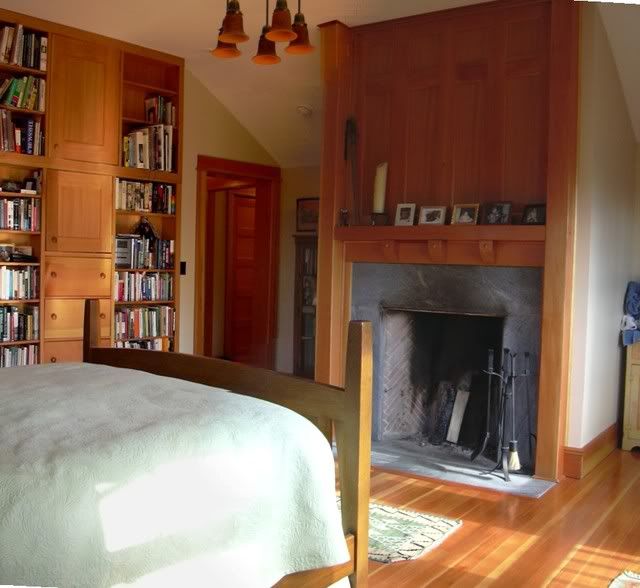
Chris
That's definitely quarter sawn yellow pine. In my 1925 Dutch Colonial, we have that flooring in the bedrooms, (and it was also in the kitchen) and then 2" white oak in the living and dining rooms. Here is an original floor in one of the bedrooms:

For what it's worth, quarter sawn douglas fir is a reasonable match (I have even used it to patch into the yellow pine). When we added a master bedroom, since I could not get yellow pine, I did doug fir there.
Here's the new bedroom with fir:

Chris