Fixing my bad back porch

A place to hang out, chat and post general discussion topics. (Non-technical posts here)
Post Reply
User avatar
Willa
Revered expert in almost everything
Posts: 1369
Joined: Tue Dec 06, 2016 9:46 pm

Fixing my bad back porch

Post by Willa »

Work has been happening on my terrible back porch since early Nov. - with a few major interruptions and delays.

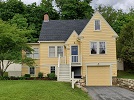
The back porch (or "porch") is a structure stuck onto the exterior back wall of the house. It appears to have been built sometime between the 40's to the 70's. From the looks of it, it was built by grandpa on the weekends, who did not have architectural plans or a permit.

The entry to the basement had previously been in the kitchen (this would make that room have 5 doorways and a large window!). This doorway had been moved to the exterior wall, in what I presume had previously been a window opening. The porch is fairly large - about 10 x 18'. The washer and dryer and utility sink are located here. BUT - there was only a tiny window stuck in the wall at one end, with a door with a small window at the other end. There was brown wood panelling on all the walls AND ceiling, and one single bulb light fixture. Some portions of the wood panelling had been covered by wallpaper. There were signs of an old leak at one corner (which corresponded with crazy DIY repairs to the eavestroughing situation) but at least this was currently dry. While this room was heated, it was always freezing. It was just grim. The exterior was covered with brittle old vinyl siding.

I pondered having the entire thing torn off and discarded - but there wasn't really another good place for the washer and dryer to go, without major plumbing and electrical. I spent a long time wondering what to do with this awful room.

Finally the contractor(John) I had used before for my kitchen and powder room and fence was available. We have been steadily undoing the strange things to get to the fixing.

The wood panelling was stripped off to reveal pre-1900's wide tongue and groove boards on the walls and ceiling. This was a happy discovery. There was one very strange area where there appeared to be the original door opening - except this turned out to be two antique doors in terrible condition stuck together. When that was removed there were a bunch of styrofoam slabs between the doors, used as some sort of insulation I guess ? The slabs were from a fabric store - what bolts of cloth were wrapped around (there were labels on the end). When the vinyl siding was peeled off, it was revealed that recycled wood, possibly from the garage from the 20's that was here, had been used to attach the siding to. The paint was same malachite green as on the 2nd floor windows.

The plan was install three salvaged windows, facing east, and then to use three matching windows for storm windows.

I had looked for a good antique door for a long time, but came up empty for something that was the right size. I finally settled on a french door with bevelled glass, as that was the best I could find, at the time.

As the bad old wood panelling was stripped off a new problem emerged. The ceiling was sagging. Like REALLY sagging. There was an opening cut into the ceiling, with pieces of plywood screwed over it. John entered the attic opening and it was good news/bad news. The framing itself looked fine, with no rot or wetness. BUT - the rafters were a little undersized and widely spaced. There was also no ledger strip connected to the brick wall. On the house side, a hole had been bashed through the brick, probably to install the stove vent assembly. In the worst saggy area BRICKS had been stuffed into the gap between the tongue and groove boards and the exterior wall. Like at least 20 bricks ! No wonder there was a sag there. We removed the bricks and John kept poking around. He tugged at a piece of wood that looked like it wasn't doing much. There was an audible groan as the ceiling dropped at least three inches in the worst area. I ran ! It was very, very bad:

badceiling.jpg
badceiling.jpg (1.62 MiB) Viewed 714 times


I was very afraid that the entire ceiling would come tumbling down like loose Jenga blocks.

We had previously decided to repair(ie make a new one) the missing ledger strip from inside the room. The side that was closest to the house had always been at least 2" lower than the east wall. Now it was at least 5" lower. Yikes.

The next day John came with three jack posts. Shoring up the ceiling turned out the be less of an ordeal than expected, and after only a couple of hours the terrible ceiling now looked like this:

betterceiling.jpg
betterceiling.jpg (1.46 MiB) Viewed 714 times


(The wall looks better with the last of the ugly panelling gone, too. Note the old stove pipe hole.)

There was a major gap between the ceiling and the brick wall. The remedy was agreed to be a strip of
2 x 6, attached to the wall with long anchors, with a piece of 2x10 above this, like a shelf, to bridge the gap, but also to support the unsupported ceiling. There will also be supports running vertically from the wall to the ceiling. This is in progress.

The windows have been installed, with leftover antique trim from the kitchen:

Nov2019.jpeg
Nov2019.jpeg (1.39 MiB) Viewed 714 times


Same with the door:

betterdoor.jpg
betterdoor.jpg (769.11 KiB) Viewed 714 times


The very rotten soffit and fascia has been repaired, and the exterior is almost fully stripped to await the siding. Doing siding in Dec. would really not be my first choice, but some chaos and delays left no other option:

strippedext.jpg
strippedext.jpg (1.64 MiB) Viewed 714 times


I forgot to mention that one of the reasons the room was so very cold - despite copious insulation - was that at some time squirrels had a real apartment complex happening in the walls. They chewed through the sheathing material (kind of particle board looking stuff) in several areas and had cozy nests in several areas between the studs. The holes they chewed were at least 10 x 12" - covered only by a couple of mm of vinyl siding ! That plus the large gap by the ceiling made for a breezy room. I will be happy if when this room is done that it will be 60F in the room if the house is 70F. As it was, the porch was about 45F with a 70F house, in late Nov.

My plan is to paint the tongue and groove boards. They were previously painted sort of a dark olive green with a varnish over that, which is very darkened. I have no desire to strip or varnish the boards. I'm unsure about leaving the brick wall as is - just scraping off the loose and flaking paint - or painting that, too.

There's still a huge amount of work to go, including repairing the awful door frame to the basement - which had been roughly bashed out of the bricks then supported with a few particle board planks. Every day the porch looks like it has more potential as a usable space, vs an area that was being used like the closet of shame. I unpacked some boxes from when I moved here (2016) and discovered contents in one box that had been packed in 2005 for the last big move before that ! I found some missing treasures (good) but I'm aiming to have no areas of useless clutter where unused stuff is stashed.

User avatar
JacquieJet
Shakes a cane at new house owners
Posts: 621
Joined: Sun Feb 14, 2016 4:37 pm
Location: Ontario, Canada

Re: Fixing my bad back porch

Post by JacquieJet »

Wow, Willa! This is such an exciting project!! Thanks for the photos! Love what you are doing!
1917-ish
Happy 100th birthday, house!!

User avatar
Willa
Revered expert in almost everything
Posts: 1369
Joined: Tue Dec 06, 2016 9:46 pm

Re: Fixing my bad back porch

Post by Willa »

JacquieJet wrote:Wow, Willa! This is such an exciting project!! Thanks for the photos! Love what you are doing!


Haha - exciting hardly covers the part where the ceiling wanted to fall down ! But thanks for your thumbs up.

The porch was just so despair inducing. So far I am very happy with the repairs and improvements. I was so relieved when John was available again. I have no idea where I would find another carpenter willing to humour my ideas and deal with used lumber. And have the skills to correct complicated strange issues.

Whoever built the structure certainly salvaged all those tongue and groove boards from somewhere that wasn't this house. The local heritage committee gave me some information on the first owners of the house. The Warren family owned (and occupied) five or six houses on this street or very close by. A photo from 1942 shows a house where the gas station building now is, and there has been a slight change of address numbers there. I wouldn't be surprised if the tongue and groove boards came from that house, before it was demolished. I also wouldn't be surprised if it was also a Warren property.

User avatar
JacquieJet
Shakes a cane at new house owners
Posts: 621
Joined: Sun Feb 14, 2016 4:37 pm
Location: Ontario, Canada

Re: Fixing my bad back porch

Post by JacquieJet »

That’s very cool.
Projects like this can be stressful, I know, it also so rewarding. I love your approach.
Isn’t it neat that salvaging materials isn’t a new concept...
can’t wait to see more pictures!
1917-ish
Happy 100th birthday, house!!

User avatar
Willa
Revered expert in almost everything
Posts: 1369
Joined: Tue Dec 06, 2016 9:46 pm

Re: Fixing my bad back porch

Post by Willa »

Yesterday's improvement: creating an interior ledger strip to support the ceiling.

2x6's and 2x 10's were joined into what is basically a shelf. This was attached to the brick wall using long fasteners, and also attached to the wood ceiling. From the attic side John attached a long board to support the weakest area. There will be three "legs" - boards that run from the floor to the new strip to reinforce the strip.

We removed the jack posts with some trepidation, but everything stayed put. Overnight everything has stayed in its new place, with no shifting.

interiorledger.jpeg
interiorledger.jpeg (1.38 MiB) Viewed 683 times

User avatar
GinaC
Forgotten more than most know
Posts: 437
Joined: Sat Jan 26, 2019 8:19 pm
Location: Newport, VT

Re: Fixing my bad back porch

Post by GinaC »

This must be a major relief, Willa, and it looks great!

I've yet to find my "John" (apologies, coincidentally his name makes it sound bad). How did you find a contractor who respects old houses and is willing to just do things slowly?
1939 Minimal Traditional

User avatar
Willa
Revered expert in almost everything
Posts: 1369
Joined: Tue Dec 06, 2016 9:46 pm

Re: Fixing my bad back porch

Post by Willa »

GinaC wrote:This must be a major relief, Willa, and it looks great!

I've yet to find my "John" (apologies, coincidentally his name makes it sound bad). How did you find a contractor who respects old houses and is willing to just do things slowly?


Thank you, Gina.

How I found John: he was the high school shop teacher of one of my former clients. I had kept in touch with her, and did some complaining about trying to find someone decent who knew what they doing. She put me in touch with John, who lives about 40 minutes away. Perhaps because he had been a teacher he is patient about answering my odd questions, and patient about unconventional approaches to problem solving. He worked in carpentry and construction, but also taught the trades. I think because he is older that he is aware of a greater variety of building techniques vs kids these days. He didn't come with a crew, so I work along side of him as needed. He's also been really good about respecting my limitations (ie arms built for reading books not hoisting beams). I don't think he has any particular enthusiasm for old houses, though.

Previously (in my former house/life) I relied on the recommendations of neighbours. They could show me the work they had done and their experiences with those contractors. Personalities will vary - ie one guy my neighbour complained was a real old fashioned sexist turned out to be easy to get along, meticulous, with a good sense of humour.

In my experience, avoid the dudes with fancy/expensive late model trucks with their logos on them, with snazzy websites loaded with flashy presentation. All the best people I've dealt with have had older vehicles with no custom branding, and no website. I also really judged how a prospective contractor dealt with me. Did he (they've all been he despite my search for she's in the trades) act respectful towards me and my house ? Did they seem like they were an active listener ? Did they respect what I was telling them ? I certainly talked to a couple of tradespeople who made up baloney about the work that would need to occur, or steamrollered over what I was telling them to give me a quote for like
$ 12,000 worth of work for what would essentially be a single days work for a mason and helper. I had one guy come by for a quote to install the other antique cabinet that is the match to my kitchen cabinet (previously a butler's pantry, so a mirror image of each other). This dude told me that he would have to "shim" my cabinets to install them (I know what a shim is, dude), and that he would charge $ 3000.00 per cabinet for installation. It took one experienced carpenter(not HIM though !) with me as a helper to install the first cabinet in less than 6 hours. That jerk was charging $ 500.00 per hour ! (That dude did indeed have a fancy, shiny big new truck with his logo on it.)

User avatar
nhguy
Stalwart
Posts: 362
Joined: Fri Sep 04, 2015 12:33 pm
Location: Far Northern NH

Re: Fixing my bad back porch

Post by nhguy »

You are doing great. You Spiderman senses are working and figuring out the best contractors. Go with your gut, it never lets you down.

User avatar
GinaC
Forgotten more than most know
Posts: 437
Joined: Sat Jan 26, 2019 8:19 pm
Location: Newport, VT

Re: Fixing my bad back porch

Post by GinaC »

Thank you so much for the advice! I have the name of a couple of old timers that my plumber gave me, but I've been worried that they'd be set in their ways. I will give them a call. Like you, I pretty much need a handyman instead of a contracting crew.
1939 Minimal Traditional

User avatar
Willa
Revered expert in almost everything
Posts: 1369
Joined: Tue Dec 06, 2016 9:46 pm

Re: Fixing my bad back porch

Post by Willa »

Today's progress:

The doorway to the basement was always terrible. The bricks had been roughly broken to create the opening, the doorway was reinforced with pieces of particleboard sort of layered on top of each other, and then on top of that were more pieces of random lumber nailed up to hold up that corner of the ceiling. Walking through that doorway did not create a confident feeling:

baddoorway.jpeg
baddoorway.jpeg (1.11 MiB) Viewed 657 times


After all the extra lumber pieces were removed the areas of broken mortar asserted themselves:

worsedoorway.jpg
worsedoorway.jpg (1.53 MiB) Viewed 657 times


In a short afternoon including a run to the lumberyard, John fixed the doorway. It is now stable and presentable:

improved.jpeg
improved.jpeg (920.88 KiB) Viewed 657 times


This short piece of antique trim is just leaning there, but it looks like a good solution to fill in that area:

doorwtrim.jpg
doorwtrim.jpg (1.36 MiB) Viewed 657 times

Post Reply