It was a very productive day. The interior stuff involving John is now 99.5% done. I have some long days with a paint brush ahead.
One of the major issues in the porch was that there were gaps, large gaps between the ceiling and walls, and in the corners where the tongue and groove boards met. There were strong drafts here:

- ceilinggap.jpg (1.55 MiB) Viewed 739 times
The most basic solution was to fill or cover them with...something ? At the best the gaps were 1/4" wide - in the worst spot, that had the most ceiling sinkage and old water damage a portion of the gap was over 2 1/2" wide. The lumberyard had some MDF cove molding that was large enough to do the trick. Personally, I think MDF is a horrible product. This stuff chipped and dinged even when handled gently. However, it filled the space well, and will be inoffensive when painted. There was smaller molding in a similar profile in finger jointed pine that filled in the corner gaps.
All those light colored spots ? Wood filler. The t&g wood was recycled from somewhere, then in my use that terrible wood siding was nailed into that. Result: many, many nail holes to fill. This pic is just a start:
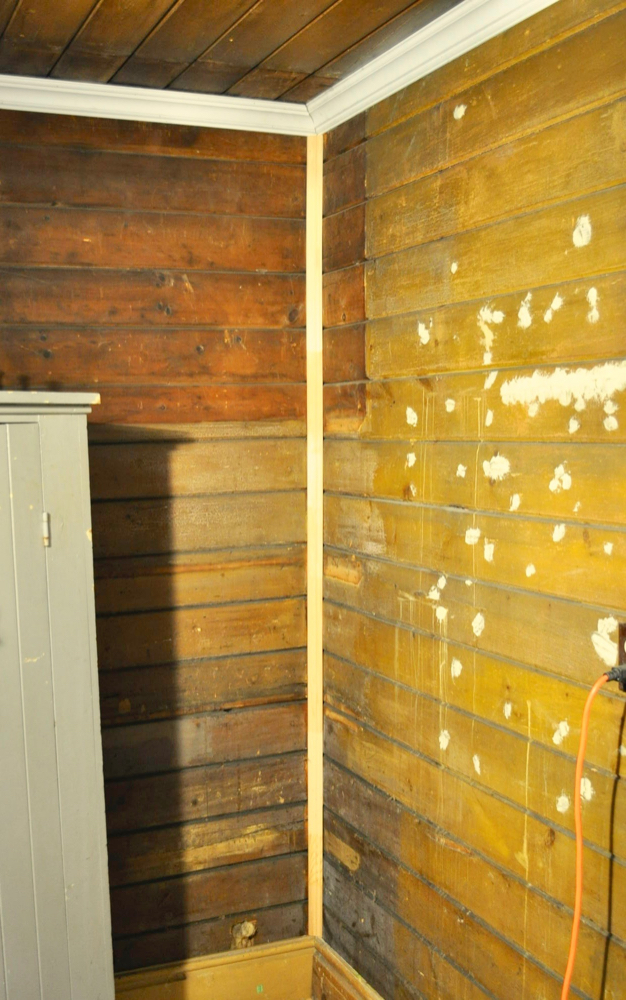
- filledgap.jpeg (727.26 KiB) Viewed 739 times
The wall with the windows has some obvious deviation where it bows out a little, creating a gap by the floor on that wall. I scored some antique baseboard at the ReStore last year for dirt cheap - like $ 3.00 for a 10' board. While it was probably unconventional to use it in a back porch on tongue and groove boards, it also helped to fill in the gaps at the bottom. Quarter round was added on the worst wall to completely fill the gap between the wall and the floor:

- cove.jpeg (869.78 KiB) Viewed 751 times
There was an opening cut into the ceiling to access the attic area. After much ruminating about making a door that could be easily opened and closed I realized this was kind of pointless. There are no ducts in the attic or anything else that would need to be regularly accessed. A cover was made that could be screwed on and off. John had a scrap of plywood, I had the last of the antique trim to make it look more finished, and like an obvious opening:

- atticop.jpeg (898.46 KiB) Viewed 739 times
Installing the cabinet turned out to be very easy. It already had a backing board. It was missing the strip inside the upper cabinets, which it would be hung from. It seemed pointless to raise the upper to create a 5" high area from the lower. Angle brackets were used to secure the upper, and basic L brackets now hold the lower section securely. I still can't believe I scored this for $ 150.00 (CAN):

- cabinstal.jpeg (890.74 KiB) Viewed 751 times
(The green strip is a board that is mounted to the underside of the upper. Why is it green ? I guess that whoever salvaged these had a green board laying around. I plan to make the edge non-green at some point.)
John also fixed the terrible basement door. It always closed funny - in a shaky, frail way. That area was such a mess I really didn't look to closely to investigate. The issue was that while the bottom hinge was a nice old original hinge, the upper hinge was a tiny, rusty, bent cabinet hinge, nailed on in a most precarious fashion. It took some wrangling to undo and redo, but now the door is a normal door again. It is completely filthy with gouges and missing paint - but that can get stripped and repainted.
It's such a relief to have this room be functional, with no outstanding issues now. I plan to swap out the light fixture, but that's not urgent. Whew !